
Default Site Roles
Refer to the following table. It’s important to familiarize yourself with higher level staff roles and functions within the Apiboost ecosystem. These are the permissions assigned by default.
These are the roles present in Apiboost once installed. All required permissions are assigned, and you can begin using them out of the box:
You can alter these roles, but it’s not advised. Content manager is safe to alter as it’s not directly responsible for API management.
|
Role |
Description |
Internal Name |
|---|---|---|
|
Admin |
|
admin |
|
Service Admin |
|
service_admin |
|
Product Owner |
|
product_owner |
|
Content Manager |
|
content_administrator |
|
Authenticated |
|
authenticated |
|
Anonymous |
|
anonymous |
|
Team Roles |
Description |
|
|
Admin |
|
|
|
Member |
|
|
Before considering user management, ensure your staff is empowered with the correct roles to perform any tasks they’re accountable for.
Do you need these roles?
It’s a fair question. Are product owners necessary? Well, if it’s just you as an admin, then no. You wouldn’t need lesser roles when you’re capable of anything. However, there’s still no proper way to shirt-size relevance either. For example, teams large and small both use the product owner role. It depends on company policy and personal responsibility within the organization. A team of 10 could have 2 admins and 4 product owners and 4 content managers to handle authoring marketing content.
Use Case: Product Owners and the Manual Approval Workflow
We’ll examine the role of the product owner using an Apiboost API workflow.
The Product Owner role exists for organizations where X staff member is accountable for Y product. As a product owner, the user is exclusively responsible for the security/visibility settings of the product and who’s given access to use it in apps. Another product owner cannot make unauthorized changes to a product that doesn’t belong to them. This is a privilege exclusive to admins.
Step 1: User initiates workflow by requesting access to a product that requires manual approval
This happens during app creation or when adding API Products to an existing app later on. We start off by creating a team app consisting of “Marketing API” and “Manual Product”:
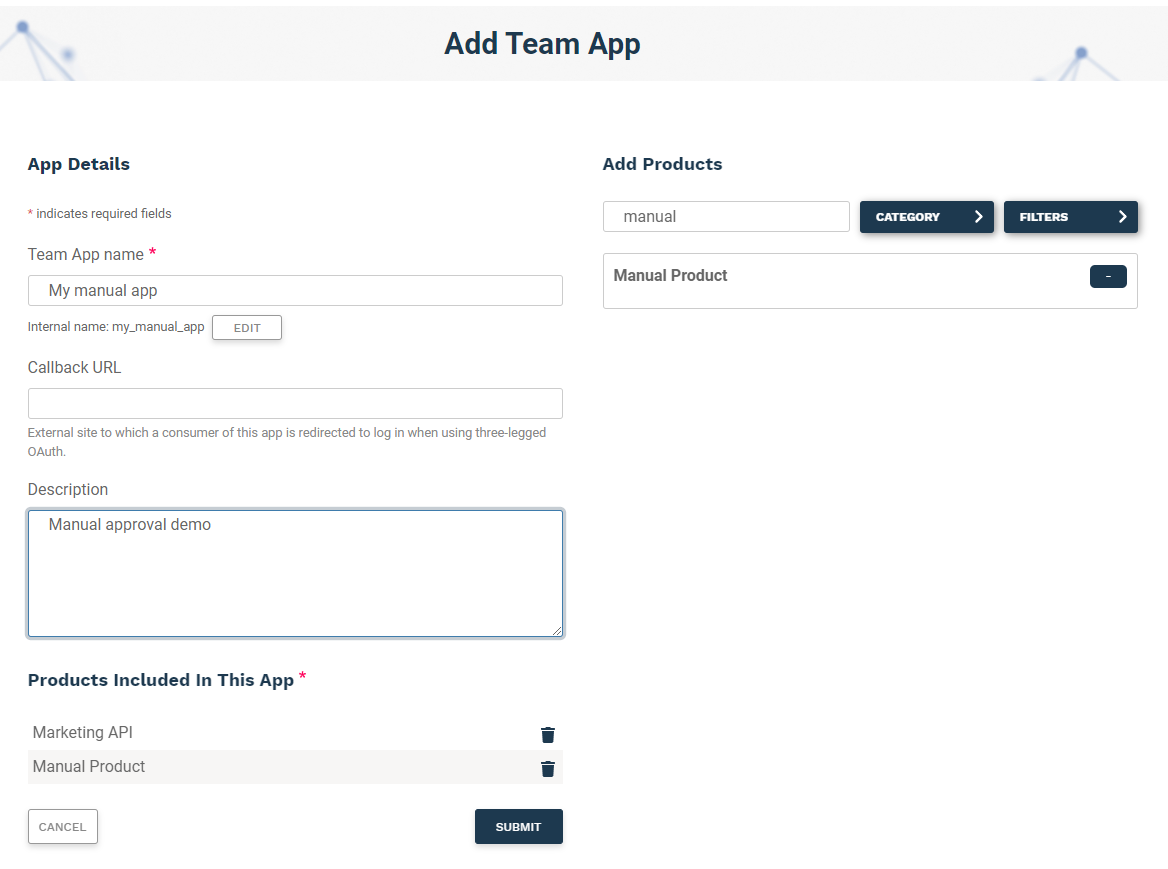
Now, manual approval isn’t a barrier that would prevent this app above from being saved. It will, however, prevent the product from being used without authorization. So, the app is saved as usual.
Step 2: Status Check for User
When creating a new app or adding API Products to an existing one, and saving your changes, you’re redirected to the app’s landing page. All pertinent information relating to the app is found here:
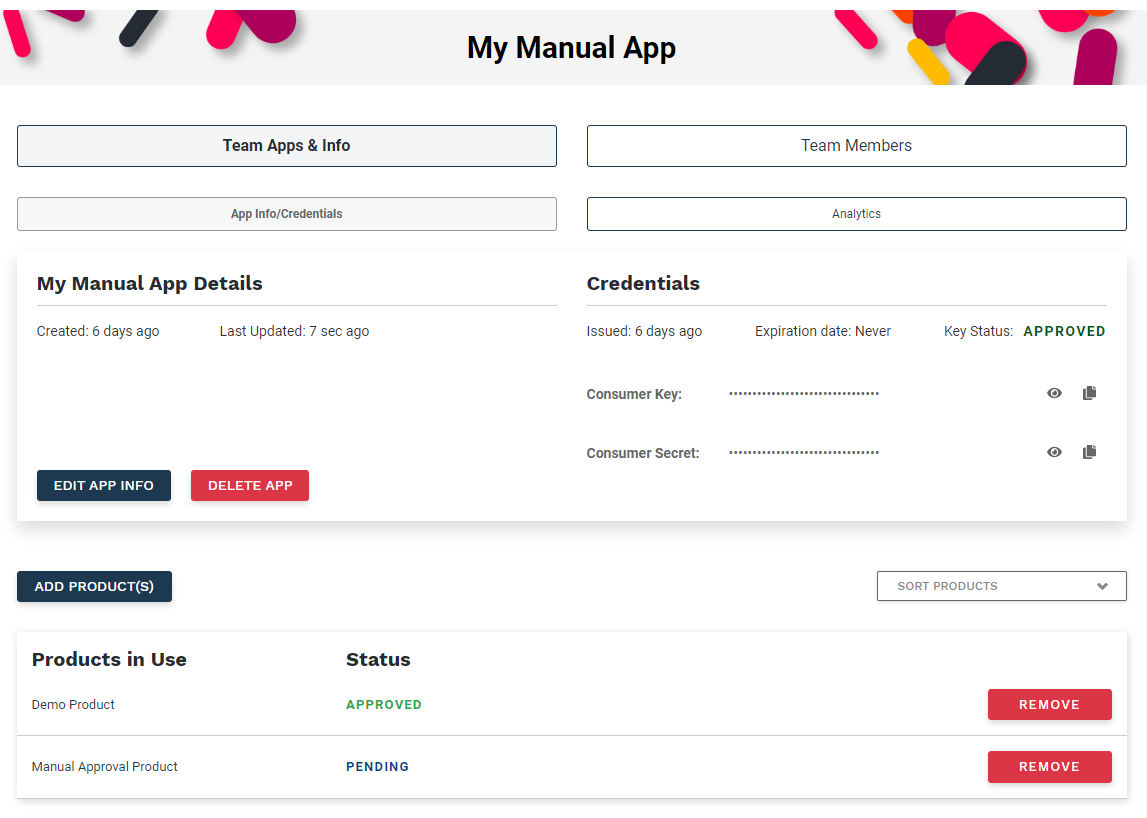
At the bottom of the page in the products list, Marketing API and Manual Product are listed with their approval statuses. Since Marketing API doesn’t require manual approval, the request to use it is automatically approved in Apiboost. However, Manual Product is Pending, awaiting manual approval from the Product Owner.
Step 3: Product Owner - Approval, Rejection or Inquiry
As the Product Owner, click the “Manage Access Requests” link in the left side admin menu. The link can be founder under “Product Optimizer.” It will take you to a page where you can approve and revoke access to your manually approved API products.
For each new request on this page you can:
-
Accept
-
Deny or
-
Request More Information
If you have sufficient info to approve the request, this is the last step.
If you have sufficient info to decline the request, this is the last step for the Product Owner. The user may still appeal your decision. Skip to Step 6 for more details.
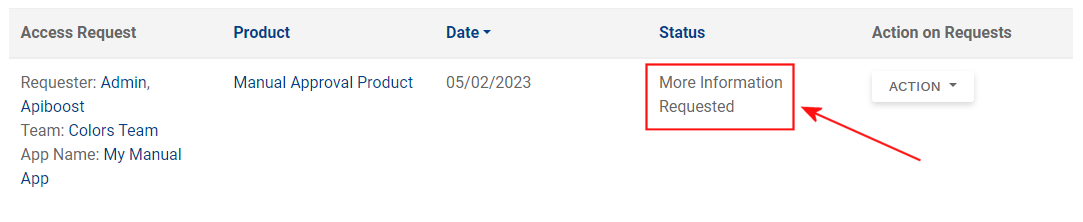
If you need more info before you can approve or decline the request, then use the request more info link:
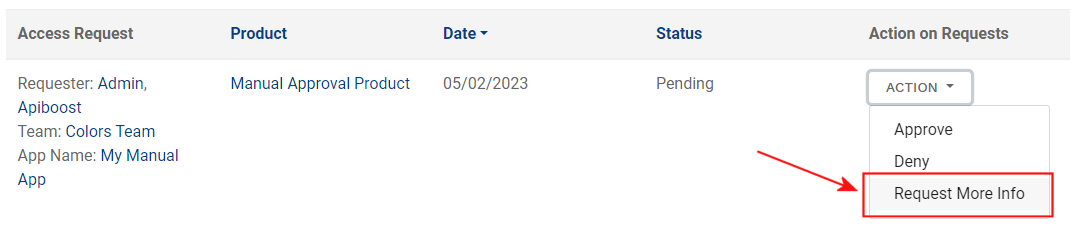
To request info, the Product Owner uses this form:
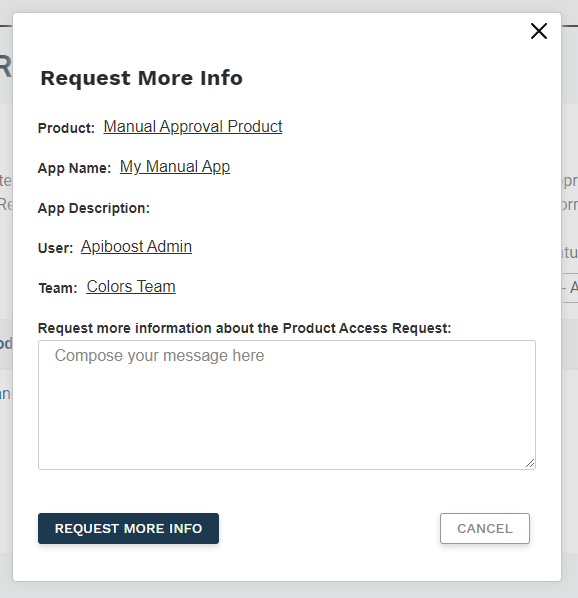
A message to the user should be composed and sent. The Product Owner can verify the message was sent by EDIT HERE
You don’t need a response to approve or deny access. Failure to respond could be a reason to decline.
Step 4: Respond (User)
When a Product Owner requests more info, you’ll be notified via email and the product status on your apps page will change:

As the user, I have a very similar response form, with the info requested (for this example, just “Product-related inquiry”):

Step 5: Review (Product Owner/Admin)
I can see on my approvals page (under status) that the user has sent the requested info:
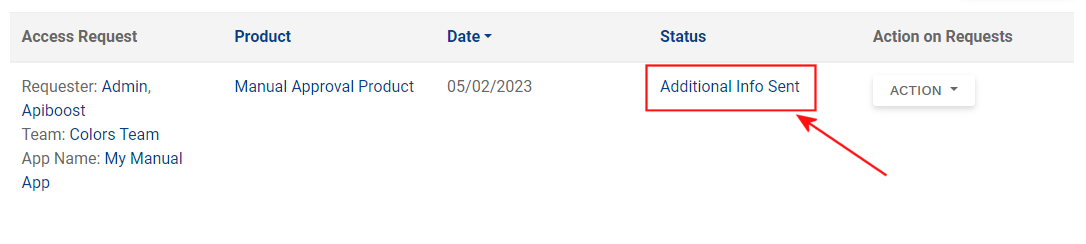
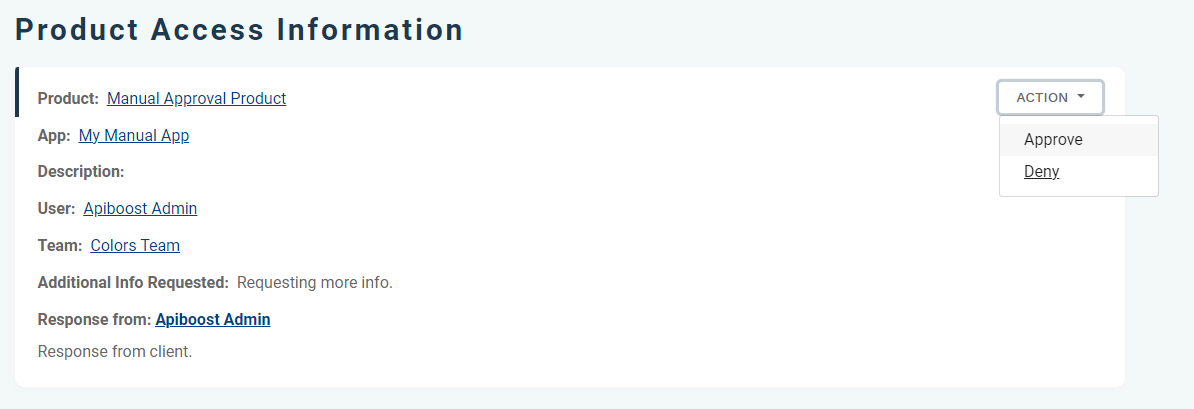
Under status, there’s a link to view the user’s response. Again, a very similar view, only this time the only option is to approve or deny the request:
Step 6: Appeal (User)
If the application is accepted then the user can start using their app. However, what happens if their request is denied? Let’s take a look at what happens if the above request is denied:

So the status changes now to revoked and a button to resubmit the access request appears. When clicking the button, a confirmation window opens:
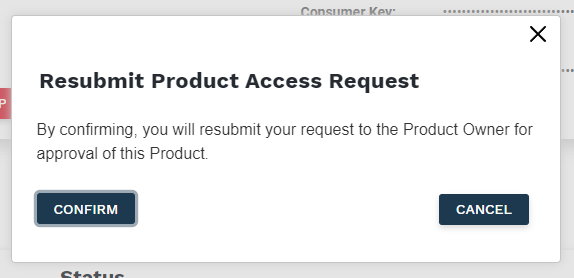
And the cycle begins again. The user may appeal as many times as they wish.