GCP Marketplace
Apiboost can be installed in your own Google Cloud project in two ways:
Directly through the marketplace (recommended)
Marketplace Deployment
Installing Apiboost through the Google Marketplace UI is the fastest and easiest way to get started. Note that the initial configuration for Apiboost is in a non-production configuration to give you time to create your content and test the portal at a lower operational cost. The default installation is not configured for high availability or high traffic. See the section on going live for details on enabling these feature during the go-live process.
Step 1: Create (or select) a project
You should create a new dedicated project for your Apiboost installation.
In the Google Cloud console, click the project list drop-down in the header to bring up the project selection dialog.

Click the “New Project” link in the upper right corner of the dialog.
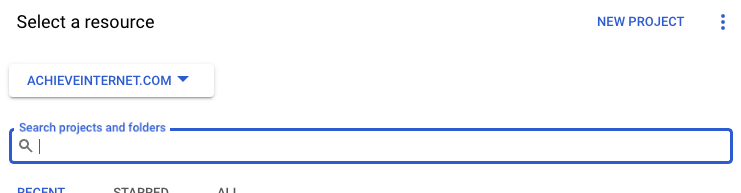
Screenshot of the project selector dialog.
Fill out the form for creating a new project and click “Create”.
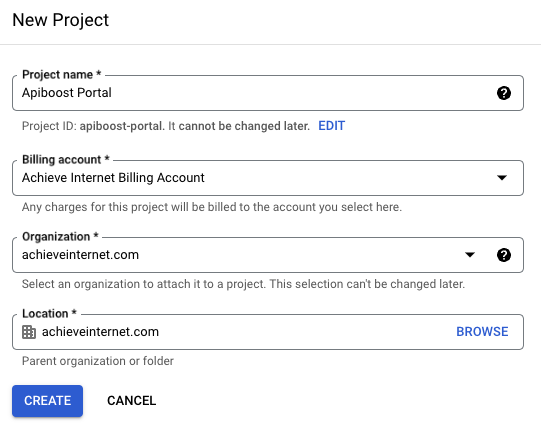
Screenshot of the create project dialog.
Wait for the project setup to complete and switch to the new project.
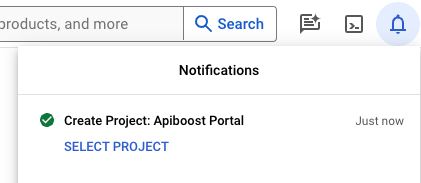
Screenshot of the project creation complete notification.
Step 1a: Enable API support on your project
Go to “APIs & Services” in your Google console
Ensure that the API “Kubernetes Engine API” and “Cloud Logging API” is enabled. if not, click the “Enable APIs and Services” to enable those APIs.
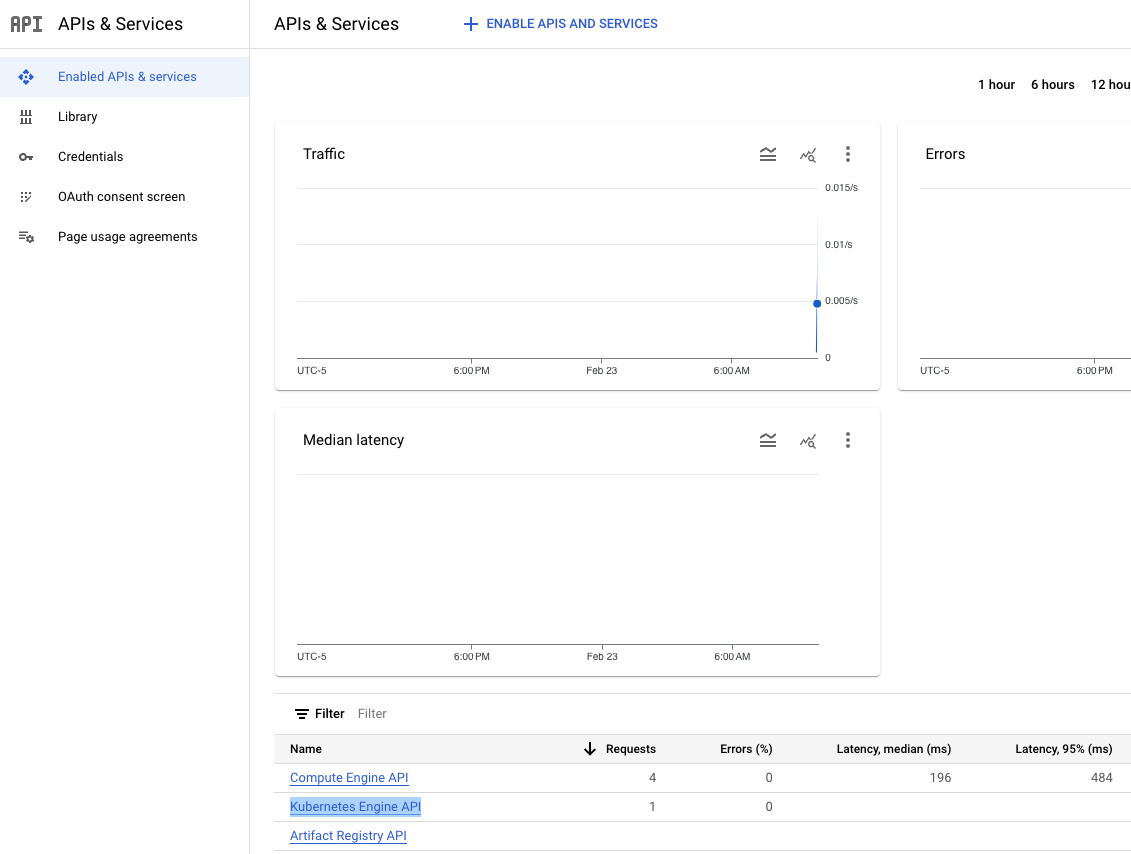
API configuration screen showing the Kubernetes Engine API enabled.
Step 2: Create a Kubernetes Cluster
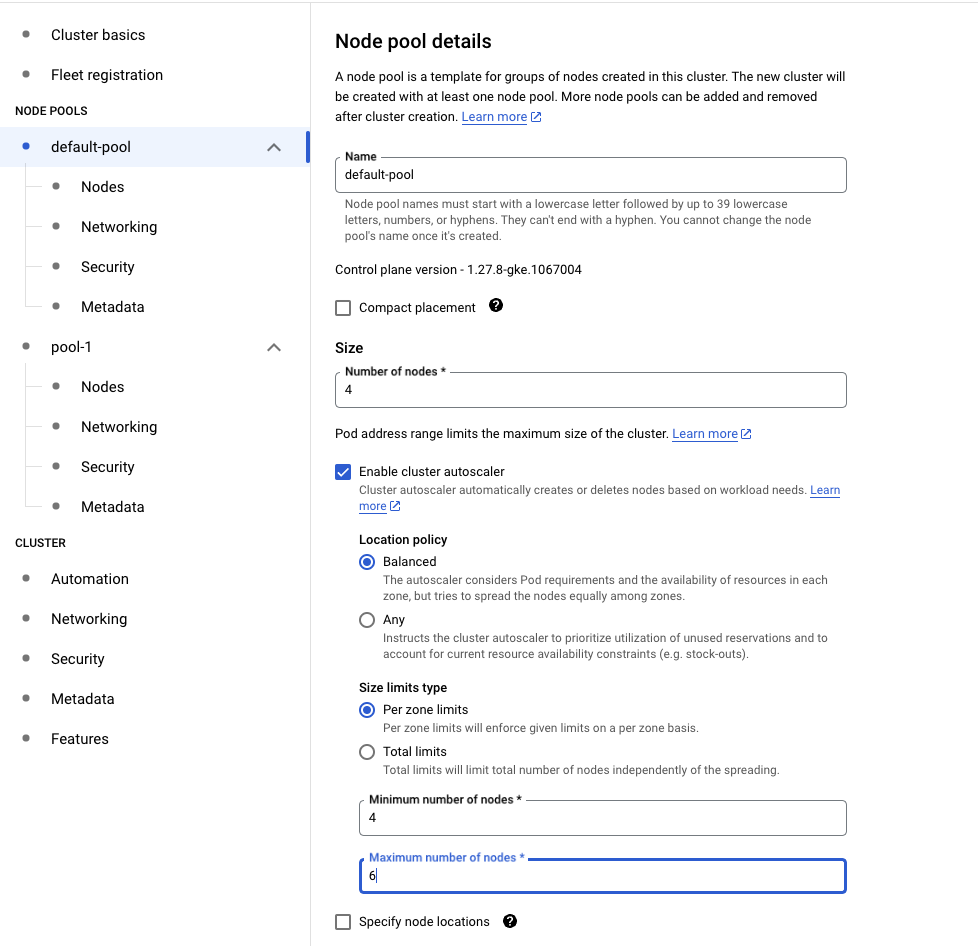
The default Kubernetes cluster configuration provided by GCP does not allocate enough nodes or resources. Be sure to set the minimum number of nodes and instance type before installing Apiboost.
Minimum Kubernetes cluster configuration:
Node pool with a minimum of 4 nodes
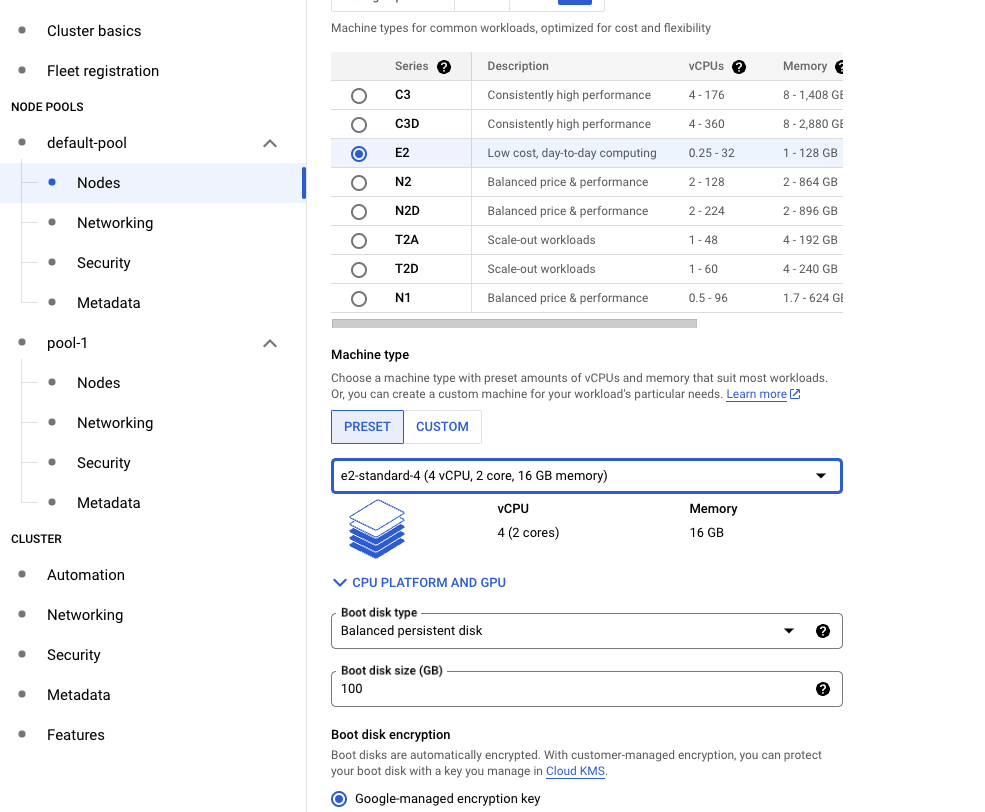
Machine type: e2-standard-4 (4vCPU, 2 core, 16GB memory) or better
In your GCP Console, go to Kubernetes Engine → Clusters
Click the “Create” button
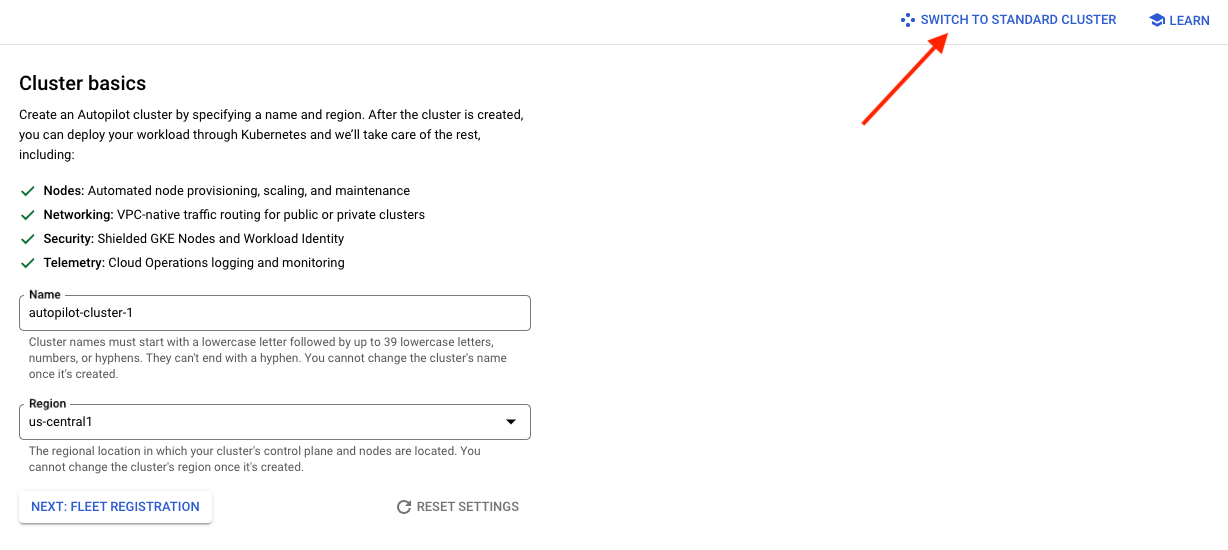
If you are presented with an option to create an “Autopilot” cluster, click the “Switch to Standard Cluster” link in the upper right corner of the screen. Autopilot clusters do not currently support Marketplace applications.
Enter the basic information for your cluster and then click on the “default-pool” node pool in the left nav
Set the “number of nodes” to 4
Click on the “Nodes” link under the node pool and set the “Machine configuration” to “e2-standard-4”
Adjust any other configurations for the cluster as needed by your organization.
Click the “Create” button. Note that the cluster creation process can take up to 30 minutes.
You must install the Kubernetes application definition on your cluster once it finishes its setup. You can do this by running the following command (assuming your gcloud/kubectl tools are already authenticated and connected to the cluster)
BASHgcloud config set project $GCP_PROJECT_NAME gcloud container clusters get-credentials $GCP_CLUSTER_ID --region $GCP_CLUSTER_REGION --project $GCP_PROJECT_NAME kubectl apply -f "https://raw.githubusercontent.com/GoogleCloudPlatform/marketplace-k8s-app-tools/master/crd/app-crd.yaml"
Step 3: Install Apiboost from the marketplace
Go to the Apiboost marketplace listing (TODO: make this a link to the listing)
Review the product information and pricing. Click the “Purchase” button.
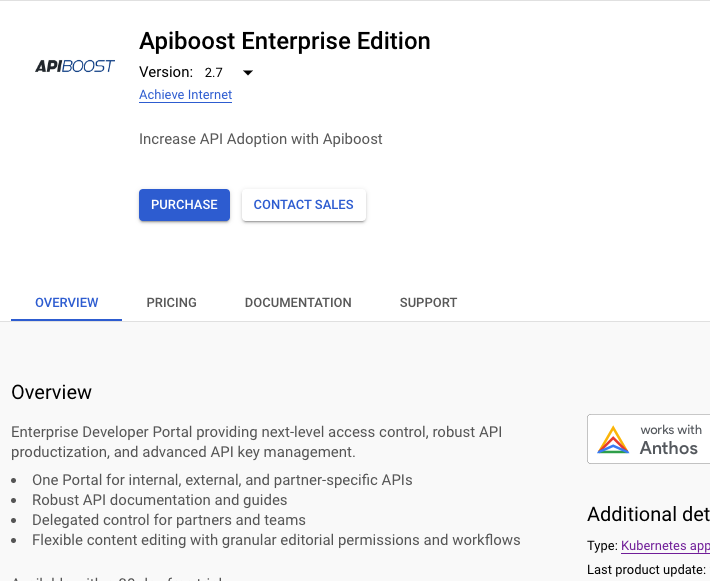
Screenshot of the Apiboost product page showing the Purchase button.
You’ll be prompted to select the Apiboost subscription plan and a billing account. Complete the form and click “Subscribe”.
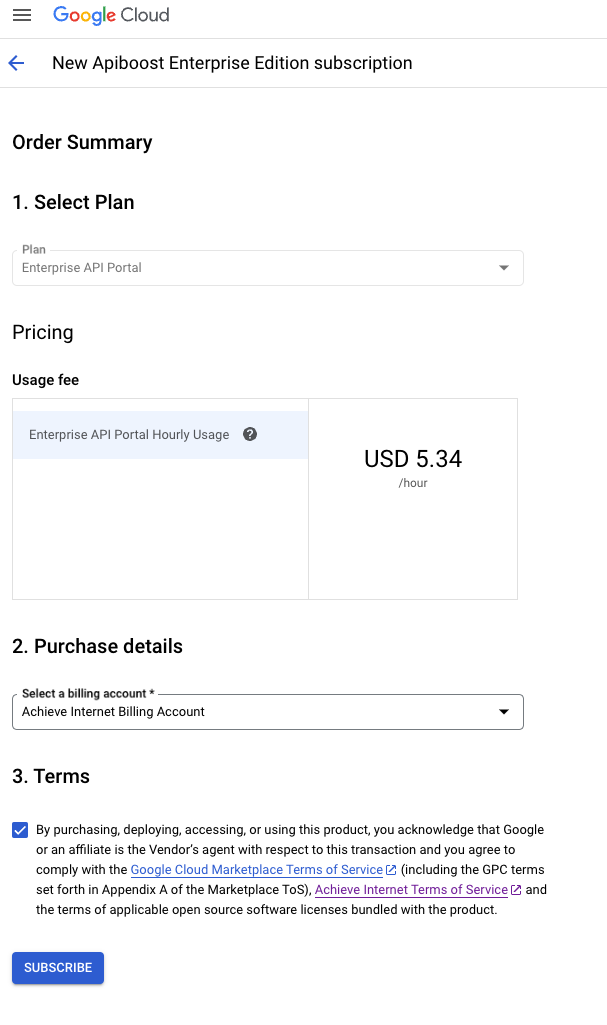
Screenshot of the subscription billing configuration screen.
You’ll then see a confirmation screen about your order being submitted, click the “Go to product page” button to continue with the production installation.
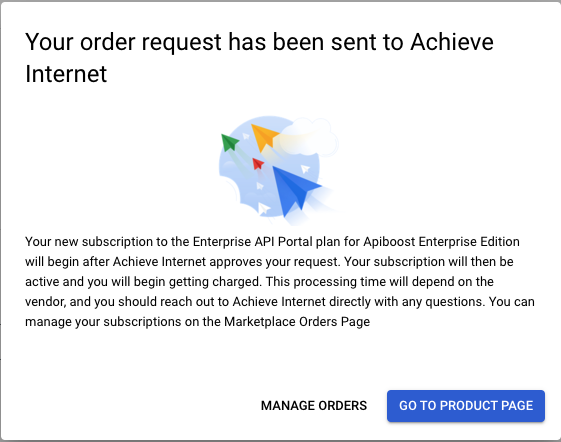
Screenshot of the order confirmation dialog.
Back on the product page, the “Purchase” button has changed to “Configure”. Click the “Configure” button.
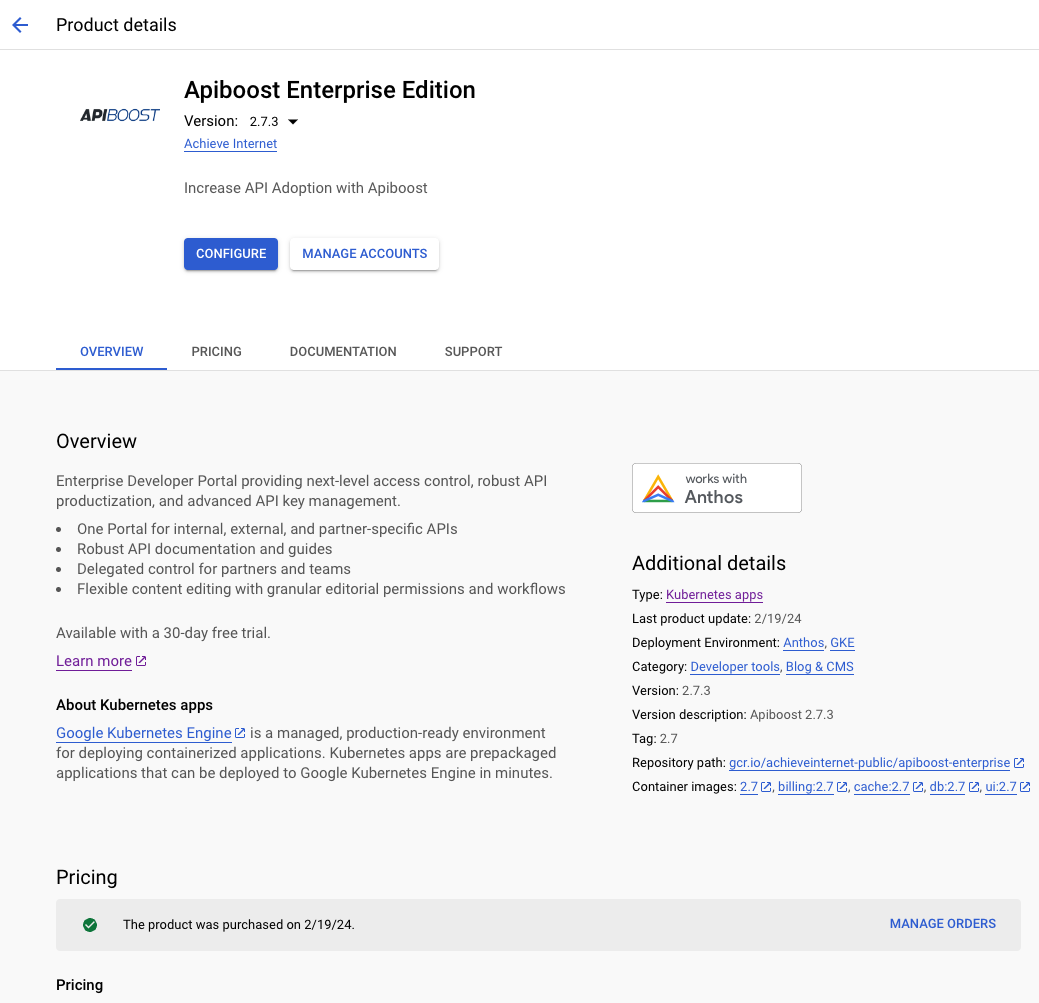
Screenshot of the Apiboost product page showing the purchase confirmation and the Configure button.
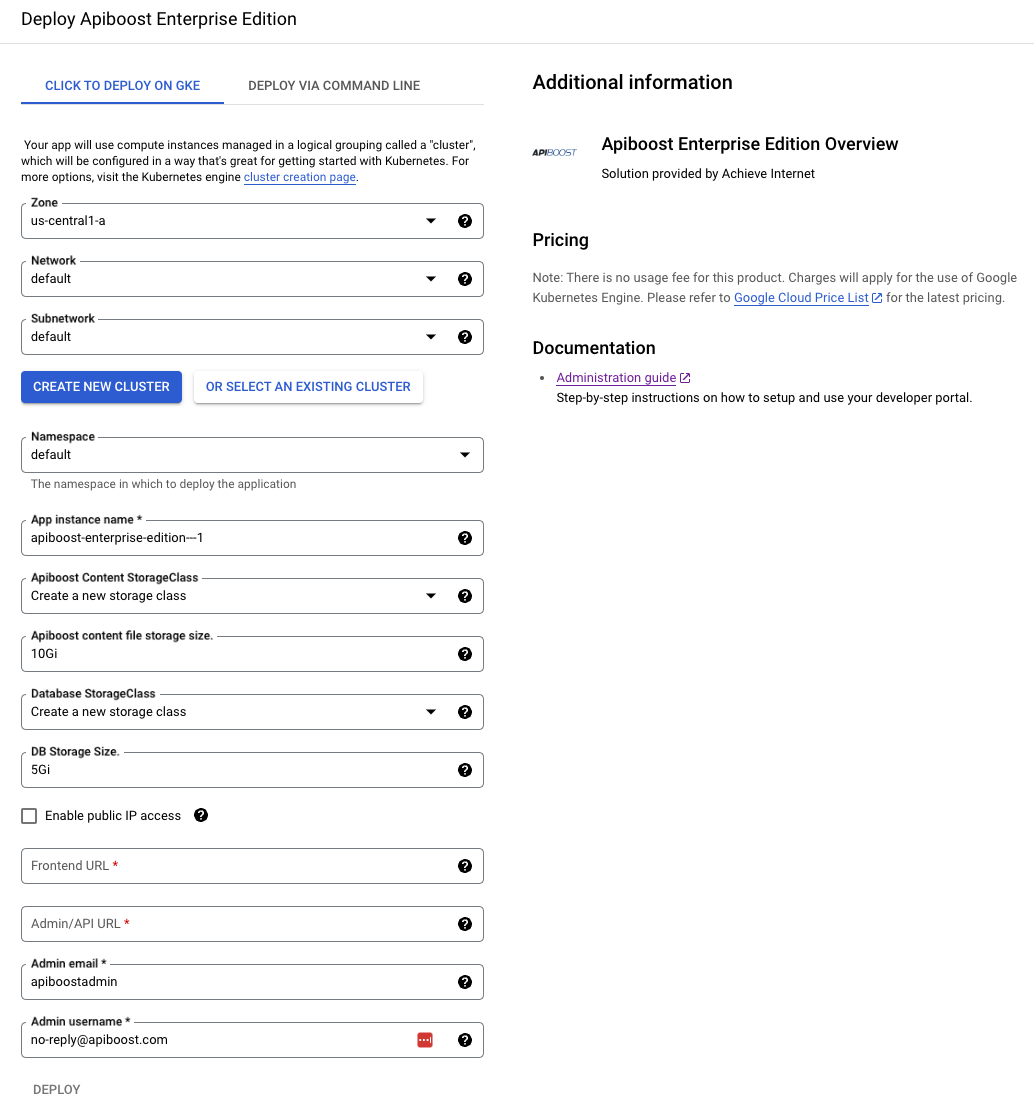
Fill out the form on the “Click to Deploy on GKE” tab
Select the Kubernetes cluster that you created in the step above.
Selecting the appropriate Zone, Network, and Subnetwork for your organization.
Select (or create a new) namespace.
Enter a name for your Apiboost installation.
Create new storage classes for the Application content files and database files.
The default sizes for the storage are suitable for most small to mid-sized developer portals.
Check the “Enable public IP access” checkbox to make Apiboost available on the Internet (recommended).
You will need to provide an alternative means of accessing the Kubernetes cluster such as a secure network integration for your users if this option is not checked.
Apiboost requires two DNS URLs, one for the end-user UI and one for the administrative UI.
Enter these URLs in the “Frontend URL” and “Admin/API URL” fields. Do not include the “https://” prefix. For example:Frontend URL: developer.apiboost.com
Admin/API URL: admin.developer.apiboost.com
NOTE: The admin/API URL must be a subdomain of the frontend URL for authentication to work correctly.
Set your preferred initial admin username and email address.
Click the Deploy button.
Screenshot of the Kubernetes configuration screen.
This will start the deployment of Apiboost to your GCP project. The initial installation of Apiboost typically takes 15-20 minutes.

Screenshot of the Apiboost installation progress dialog.
NOTE: It can sometimes take the admin backend ingress controller a few minutes to fully activate after the installation completes. This will be indicated by the message “Some backend services are in UNKNOWN state”. Just give the site a few minutes for all of the health probes to complete their monitoring checks if this happens.

Screenshot of the Ingress controller startup error.
Step 4: Perform initial Apiboost configuration
Apiboost does not include a built-in email server for security reasons. Thus features such as password recovery within Apiboost will not work until you have configured either a Sendgrid (recommended) or SMTP mail server connection within Apiboost.
Retrieving your initial login credentials
The username and password for the default admin account on your Apiboost portal can be found in your GCP Console by going to Kubernetes Engine → Applications → Apiboost. Near the bottom of the screen you will see lines for the Admin username, password, and email. Click the “preview secret data ” link next to each item to view the credentials.
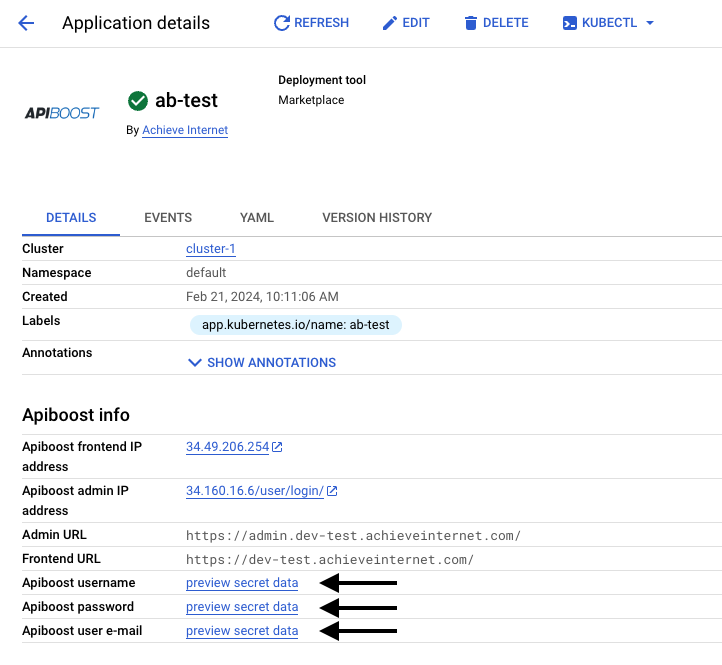
Screenshot of the app info page with markers highlighting the default admin credentials.
On this same page, you will see an entry named “Apiboost admin IP Address”. This is the URL that can be used to perform the initial configuration.
NOTE: This assumes that you selected the “Enable public IP access” during the install process.
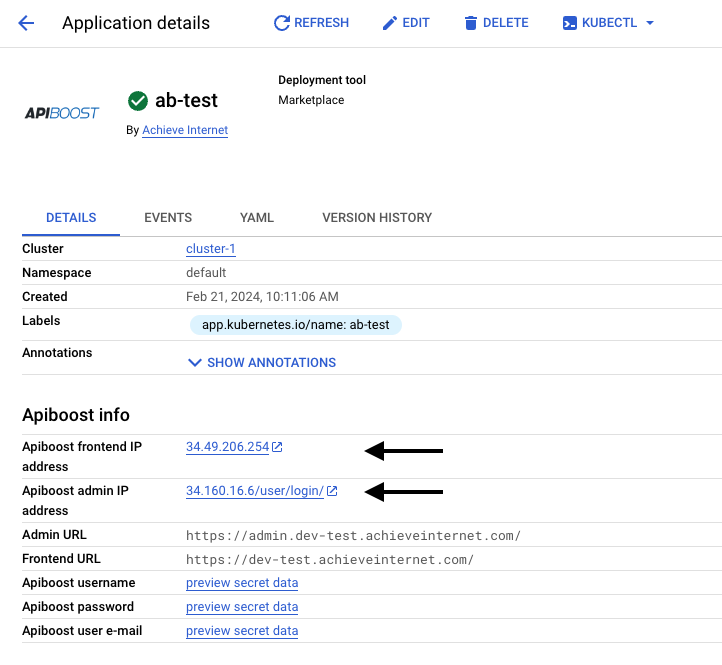
Screenshot of the app information screen with markers pointing to the site IP addresses.
See the Installation and Setup section of this site for information on configuring your Apiboost installation.
Step 5: Setup DNS for your portal
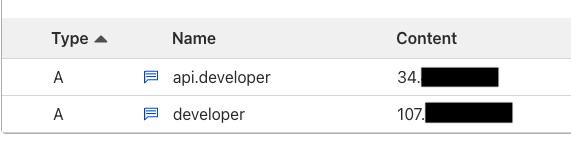
If you selected “Enable public IP access” during the configuration process, the final step will be to create 2 DNS entries so that your users can access the portal.
NOTE: By default, the installation process assigns ephemeral IPs rather than static IP addresses. It is recommended that you update the load balancer configuration to use static IP addresses prior to configuring DNS.
On the Kubernetes application page, you will see two IP addresses listed. One is for the frontend UI, and one is for the backend admin UI/API.
Screenshot of the app information screen with markers pointing to the site IP addresses.
You’ll need to create 2 DNS A records that point at these IP addresses. For example:
Screenshot of an example DNS configuration.
Step 5: Go Live
See the section on going live for step-by-step instructions on how to make your portal production-ready.