
How to Manage Access Groups
Task-based guides for common Apiboost Access Group operations. Each section is self-contained — jump to the task you need.
All tasks on this page require an Administrator or Admin site role.
Create an Access Group
-
Navigate to Products → Access Groups
-
Click Create Access Group(s)
-
Enter an Access Group Name for the group
-
Optionally enter a Description explaining the group's purpose
-
Click Save
You'll be redirected to the new group's landing page.
Edit an Access Group
-
Navigate to Products → Access Groups
-
Click the group name to open it
-
Click the Edit tab
-
Update the Access Group Name or Description
-
Click Save
Delete an Access Group
Deleting an Access Group immediately removes access for all developers and teams in the group. Products associated with the group will become invisible to those users if the products are set to Private visibility.
-
Navigate to Products → Access Groups
-
Click the group name to open it
-
Click the Edit tab
-
Click Delete
-
Confirm the deletion in the modal
The Authenticated Users group cannot be deleted. It is a system-managed group that Apiboost uses to grant access to products with Authenticated visibility.
Add Products to a Group
-
Navigate to Products → Access Groups and click the group name
-
On the Products tab, click Manage Products
-
On the Add Products page, find the product in the list on the left and click the + button
-
The product moves to the Products Included In This Access Group panel on the right
-
Click Save
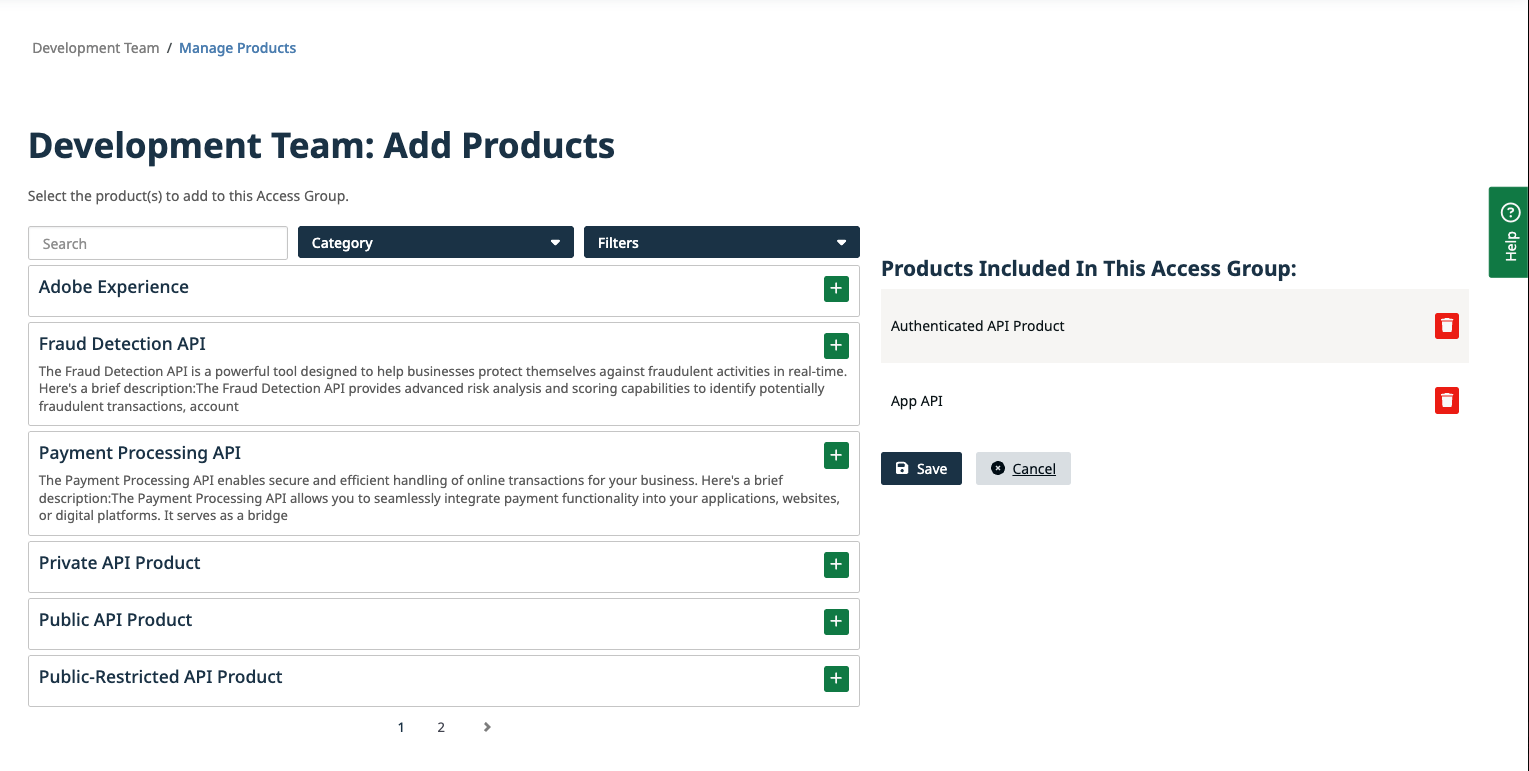
You can add multiple products at once before saving.
Remove Products from a Group
-
Navigate to Products → Access Groups and click the group name
-
On the Products tab, click Manage Products
-
In the Products Included In This Access Group panel on the right, click the delete button next to the product to remove it
-
Click Save
Removing a product from a group does not change the product's visibility setting. If the product is Private and not in any other Access Group, it will be invisible to all non-admin users.
Add a Developer
-
Navigate to Products → Access Groups and click the group name
-
Click the Developers tab
-
Click Add Developer
-
In the Developer field, begin typing the developer's username and select them from the autocomplete list
-
Click Save
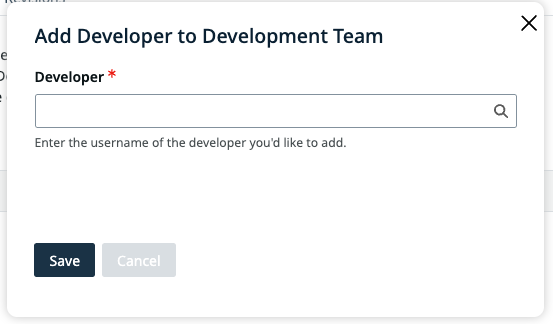
The developer immediately gains access to all products in the group.
Remove a Developer
-
Navigate to Products → Access Groups and click the group name
-
Click the Developers tab
-
Find the developer in the list
-
Click Remove next to their name
-
Confirm the removal
The developer immediately loses access to any Private products that were only accessible through this group.
Add a Team
Adding a team grants all members of that team access to the group's products.
-
Navigate to Products → Access Groups and click the group name
-
Click the Teams tab
-
Click Add Team
-
In the Search for a Team field, begin typing the team name and select it from the autocomplete list
-
Click Add Team
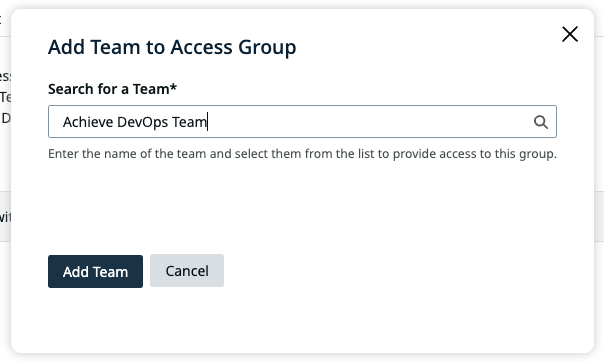
When new members are added to the team in the future, they automatically inherit access to this group's products. No manual update to the Access Group is needed.
Remove a Team
-
Navigate to Products → Access Groups and click the group name
-
Click the Teams tab
-
Find the team in the list
-
Click Remove next to the team name
-
Confirm the removal in the modal
Removing a team removes access for all of that team's members, unless those members are also added individually as Developers in the same or another group.
Manage Group Admins
Group Admins can manage the products, developers, and teams within a specific Access Group without needing a site-wide Admin role.
To manage group admins, your account must have the Manage access group admins permission.
Grant Admin Role
-
Navigate to Products → Access Groups and click the group name
-
Click the Developers tab
-
Find the developer in the members list
-
Click Edit next to their name
-
Check the Admin role
-
Click Save
Revoke Admin Role
-
Follow the same steps as above
-
Uncheck the Admin role
-
Click Save
The developer remains a member of the group but can no longer manage its contents.