
Apiboost Configuration Step 1
-
Log into Apiboost with an administrative account
-
Go to Configuration → People → OpenID Connect
-
Click the Settings tab
-
Save user claims on every login: checked
-
Override registration settings: not checked
-
Logout from identity provider: Recommend checked
-
Autostart login process: not checked
-
OpenID button display in user login form: Recommend “Replace”
-
Redirects:
-
Login: /dashboard
-
Logout: /user/login
-
-
User claims mapping
-
Timezone: Zoneinfo
-
First name: Given name
-
Last name: Family name
-
-
Advanced: Automatically connect existing users: Checked
-
Click “Save configuration”
-
-
Click the “Clients” tab and then “Generic OAuth 2.0”
-
Name: <Enter a short name for the connection, will be used in the callback URL>
-
Client ID: <Enter any placeholder value, actual value will come from the key below>
-
Client secret: <Enter any placeholder value, actual value will come from the key below>
-
Prompt: Login
-
UserInfo endpoint: https://graph.microsoft.com/oidc/userinfo
-
NOTE: The above URLs may be different for your environment. Click the “Endpoints” button in Azure after the Entra Configuration step below is completed to get the actual endpoints.
-
Scopes: openid email profile
-
Copy the displayed “Redirect URL” and provide to the Entra configuration step below
-
Click “Create OpenID Connect client”
-
Azure Entra Configuration
-
Log into your Azure portal with an account that has permission to create/manage Entra App Registrations (Entra → Manage → App registrations)
-
Click “New registration”
-
Name: <enter a name for the application>
-
Supported account types: Single tenant only
-
Redirect URI:
-
Type: Web
-
URI: <Redirect URL from the previous step>
-
-
Click “Register”
-
-
From the “Overview” tab, copy and save the “Application (Client) ID”
-
From the “Overview” tab, click “Add a certificate or secret” (alt, click “Certificates & secrets” in the left nav)
-
Add a new client secret
-
Copy the secret “Value”
-
-
Click “API permissions” in the left nav
-
Verify that “Microsoft Graph” has the permissions “email”, “openid”, “profile”, and “User:Read”.
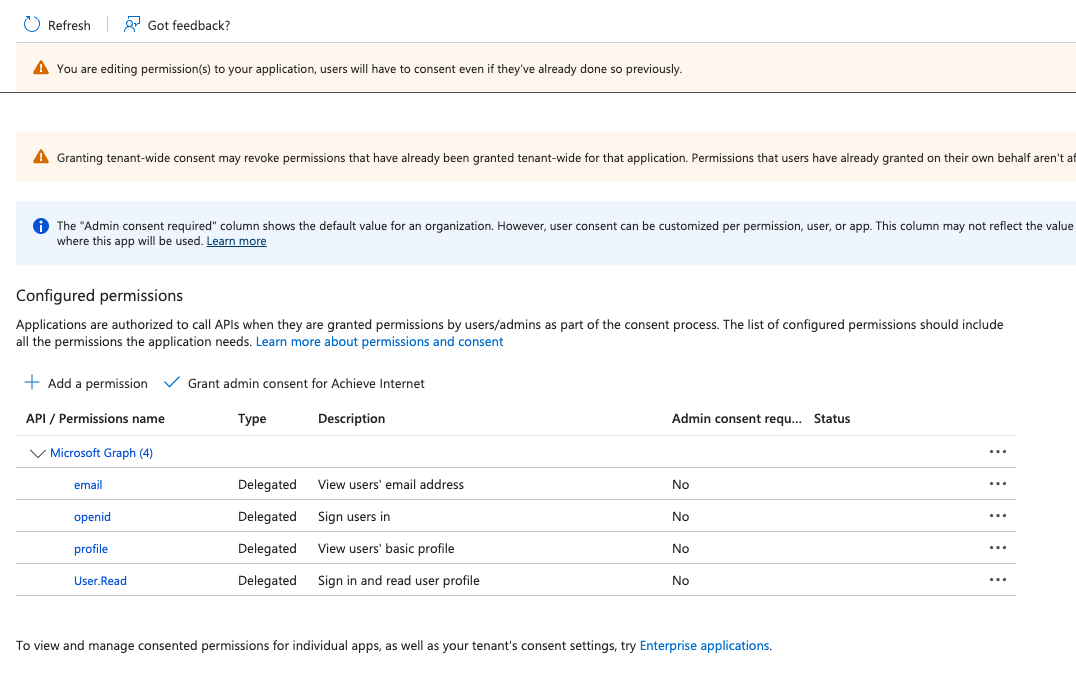
-
If any permissions are missing, click “Add a permission” and add the missing permissions.
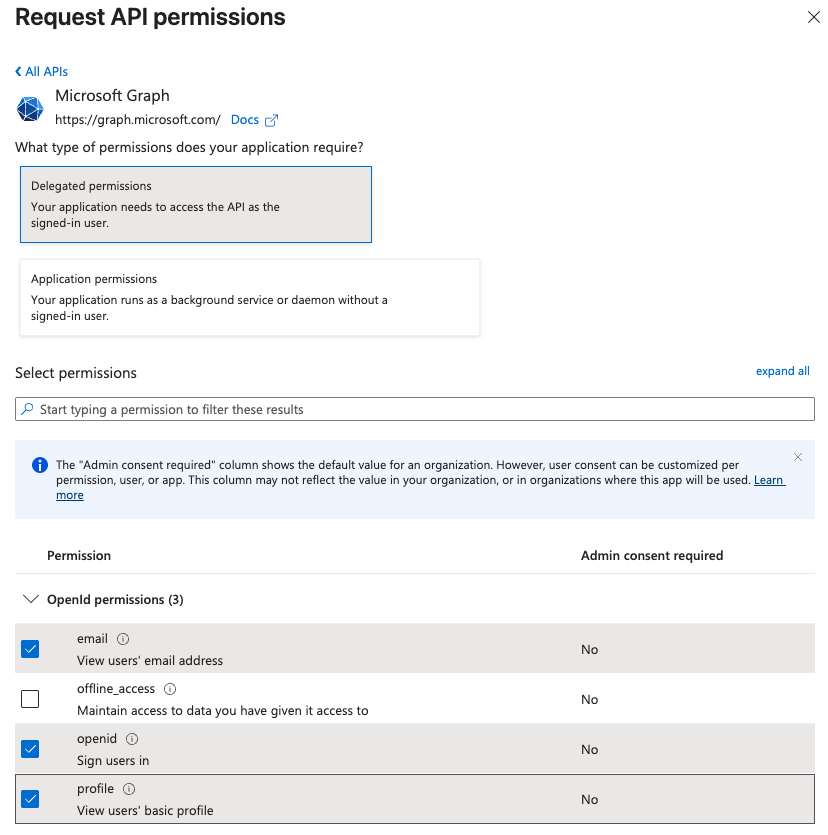
-
-
From the “Overview” tab, click the “Endpoints” button and provide the following values for the Apiboost Configuration Step 2:
-
OAuth 2.0 authorization endpoint (v2)
-
OAuth 2.0 token endpoint (v2)
-
Apiboost Configuration Step 2
-
Go to Configuration → System → Keys
-
Edit the keys “Entra Client ID” and “Entra Client Secret” entering the Entra client id and secret into the value fields
-
-
Edit the OIDC connection created in step 1
-
Update the “Authorization endpoint” and “Token endpoint” with the values from the Entra configuration