
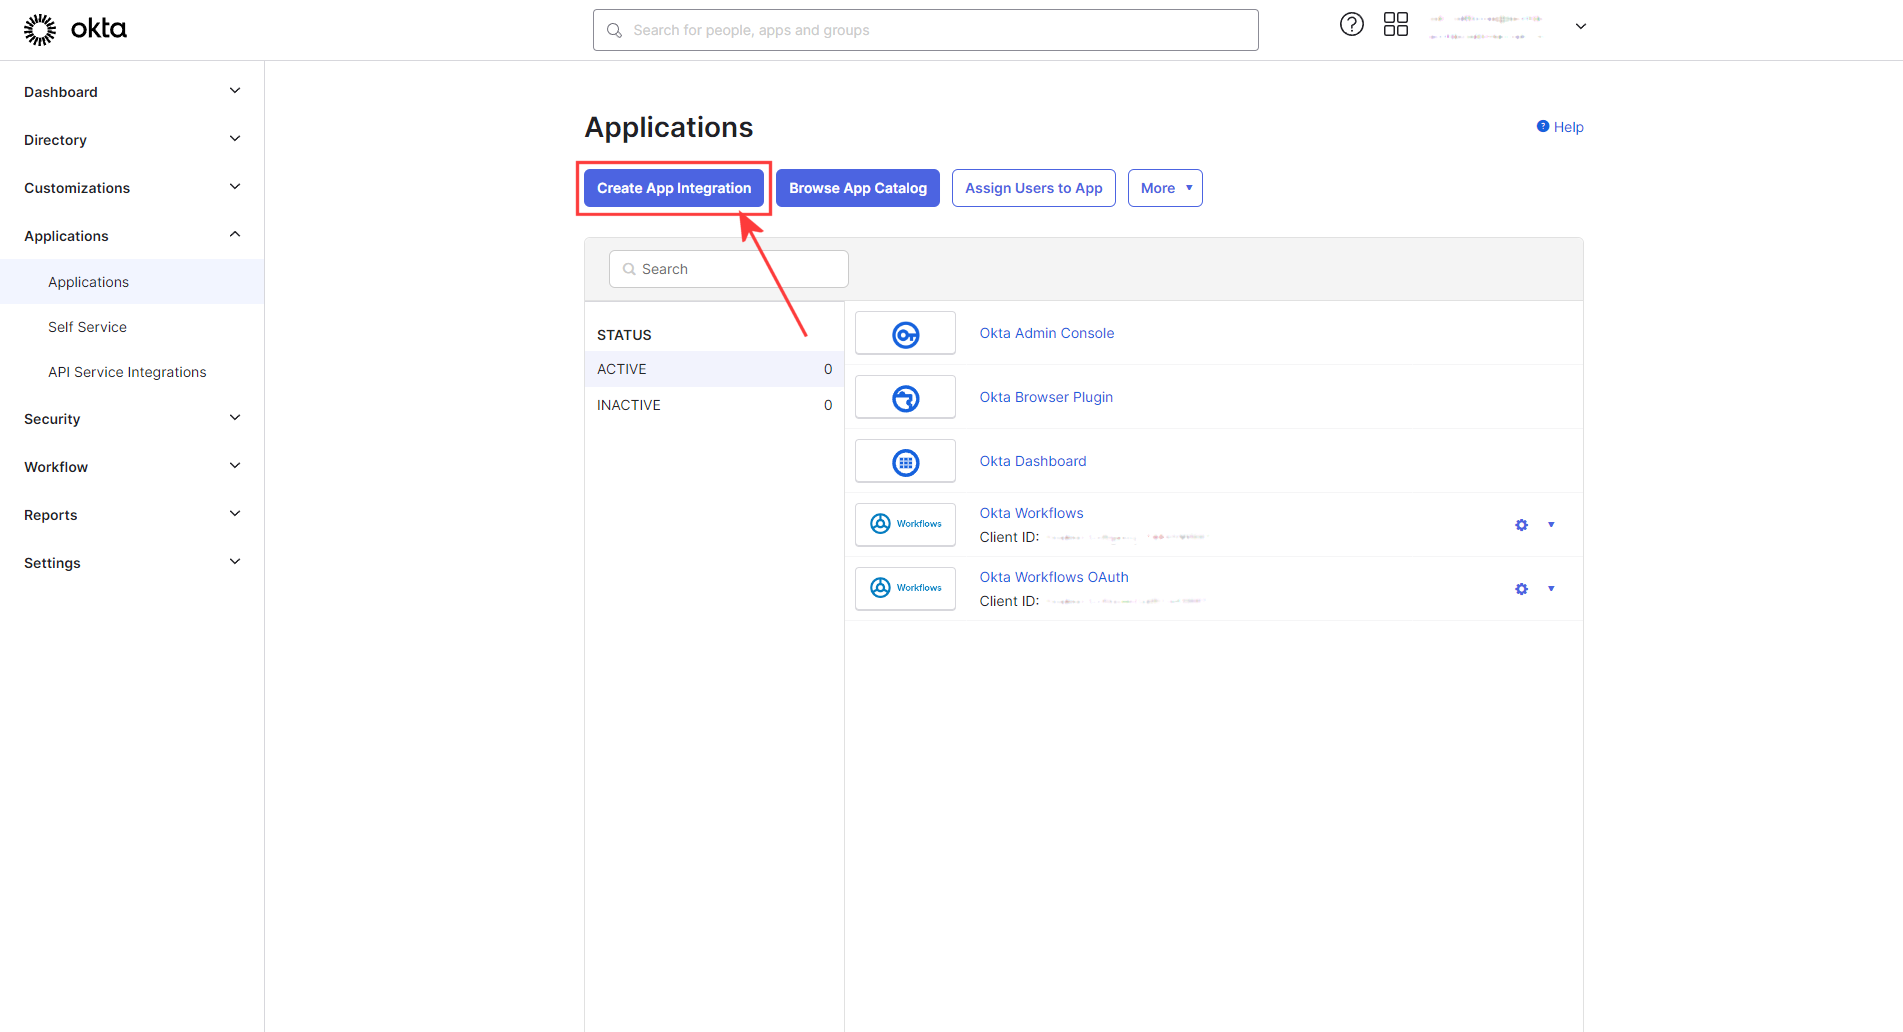
Sign into Okta. Under applications in the left menu, select Applications and click Create App Integration:
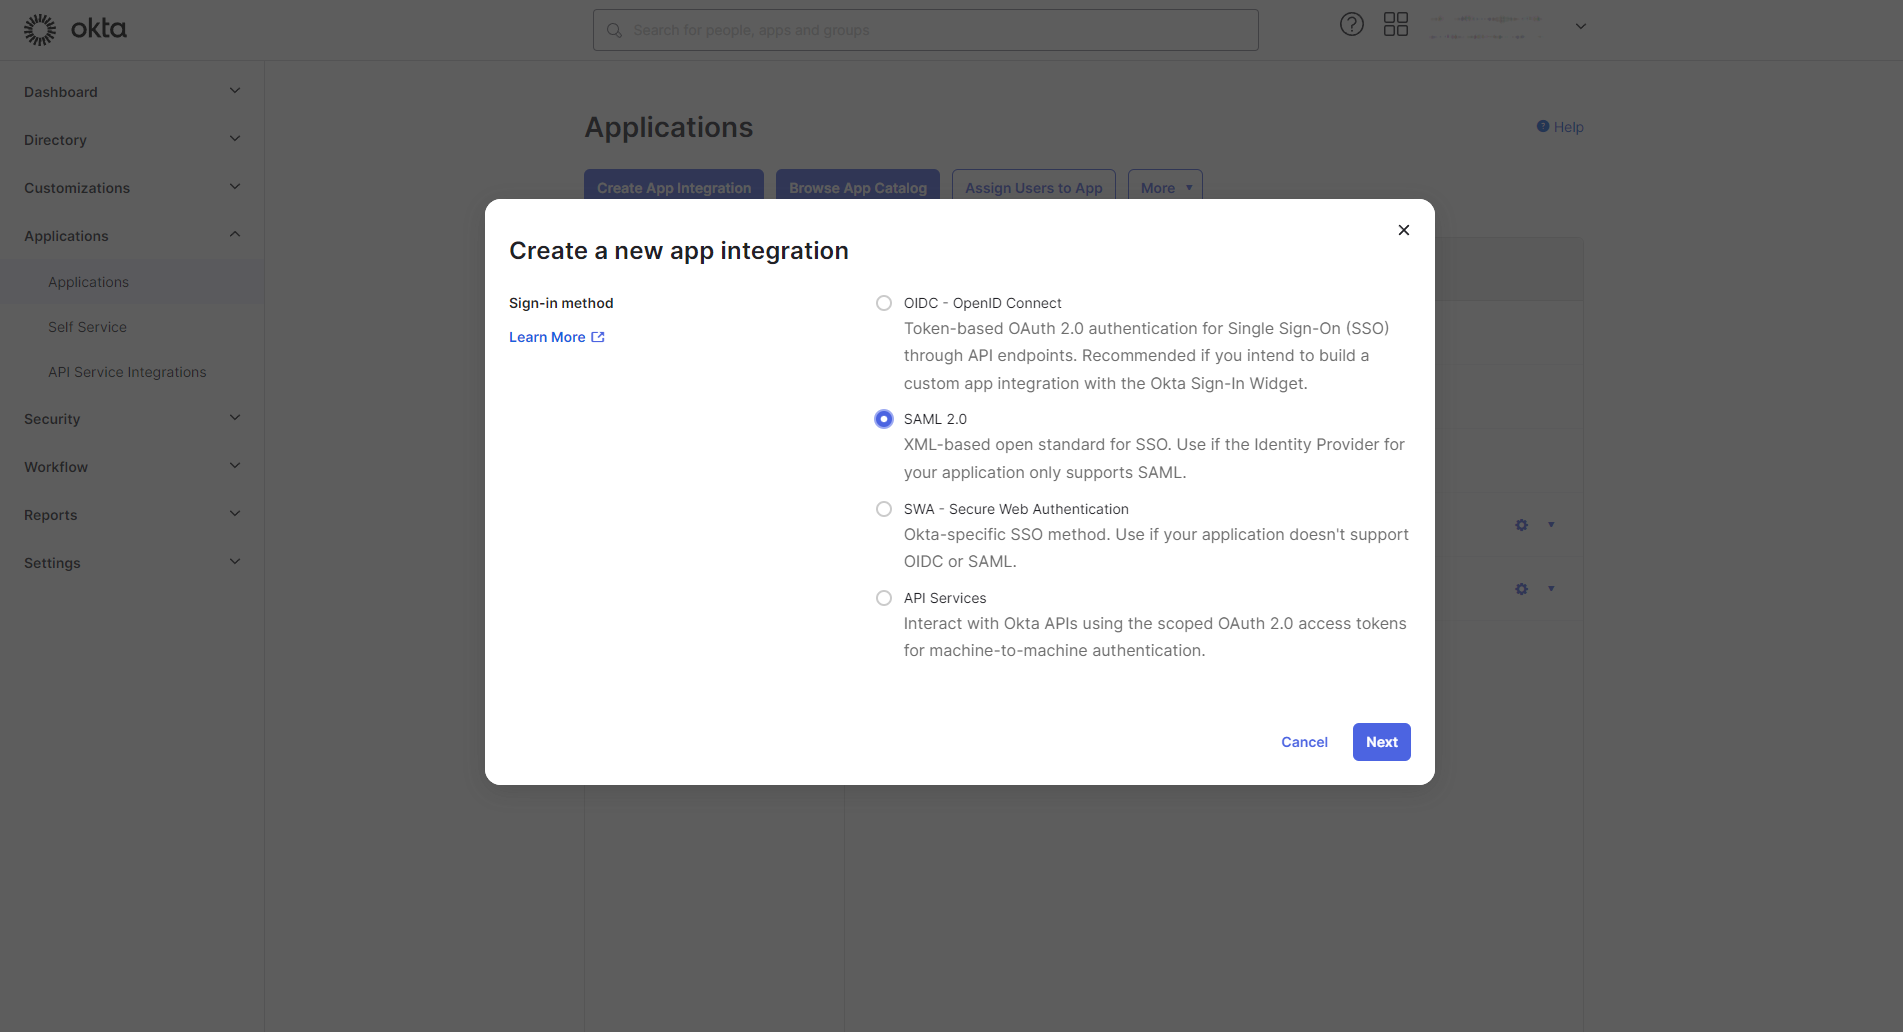
Select SAML 2.0 from the modal:
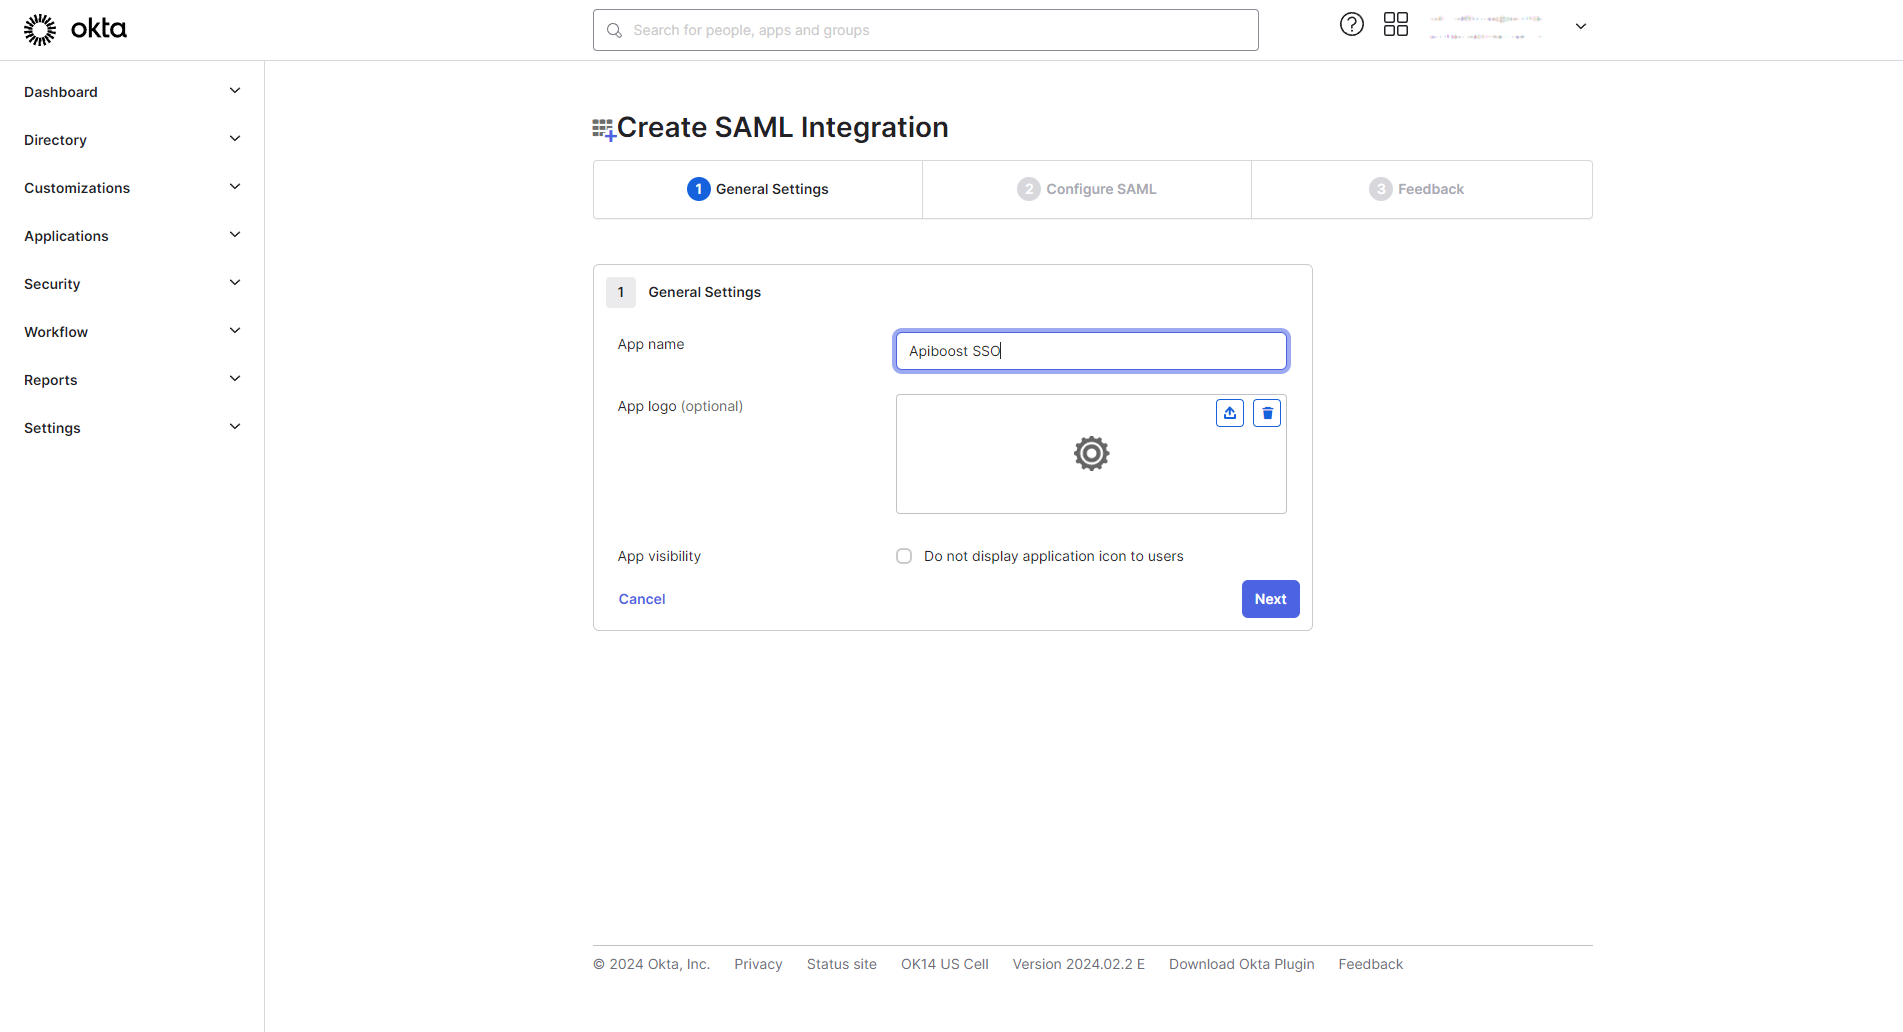
Next screen, fill in the App Name and click next:
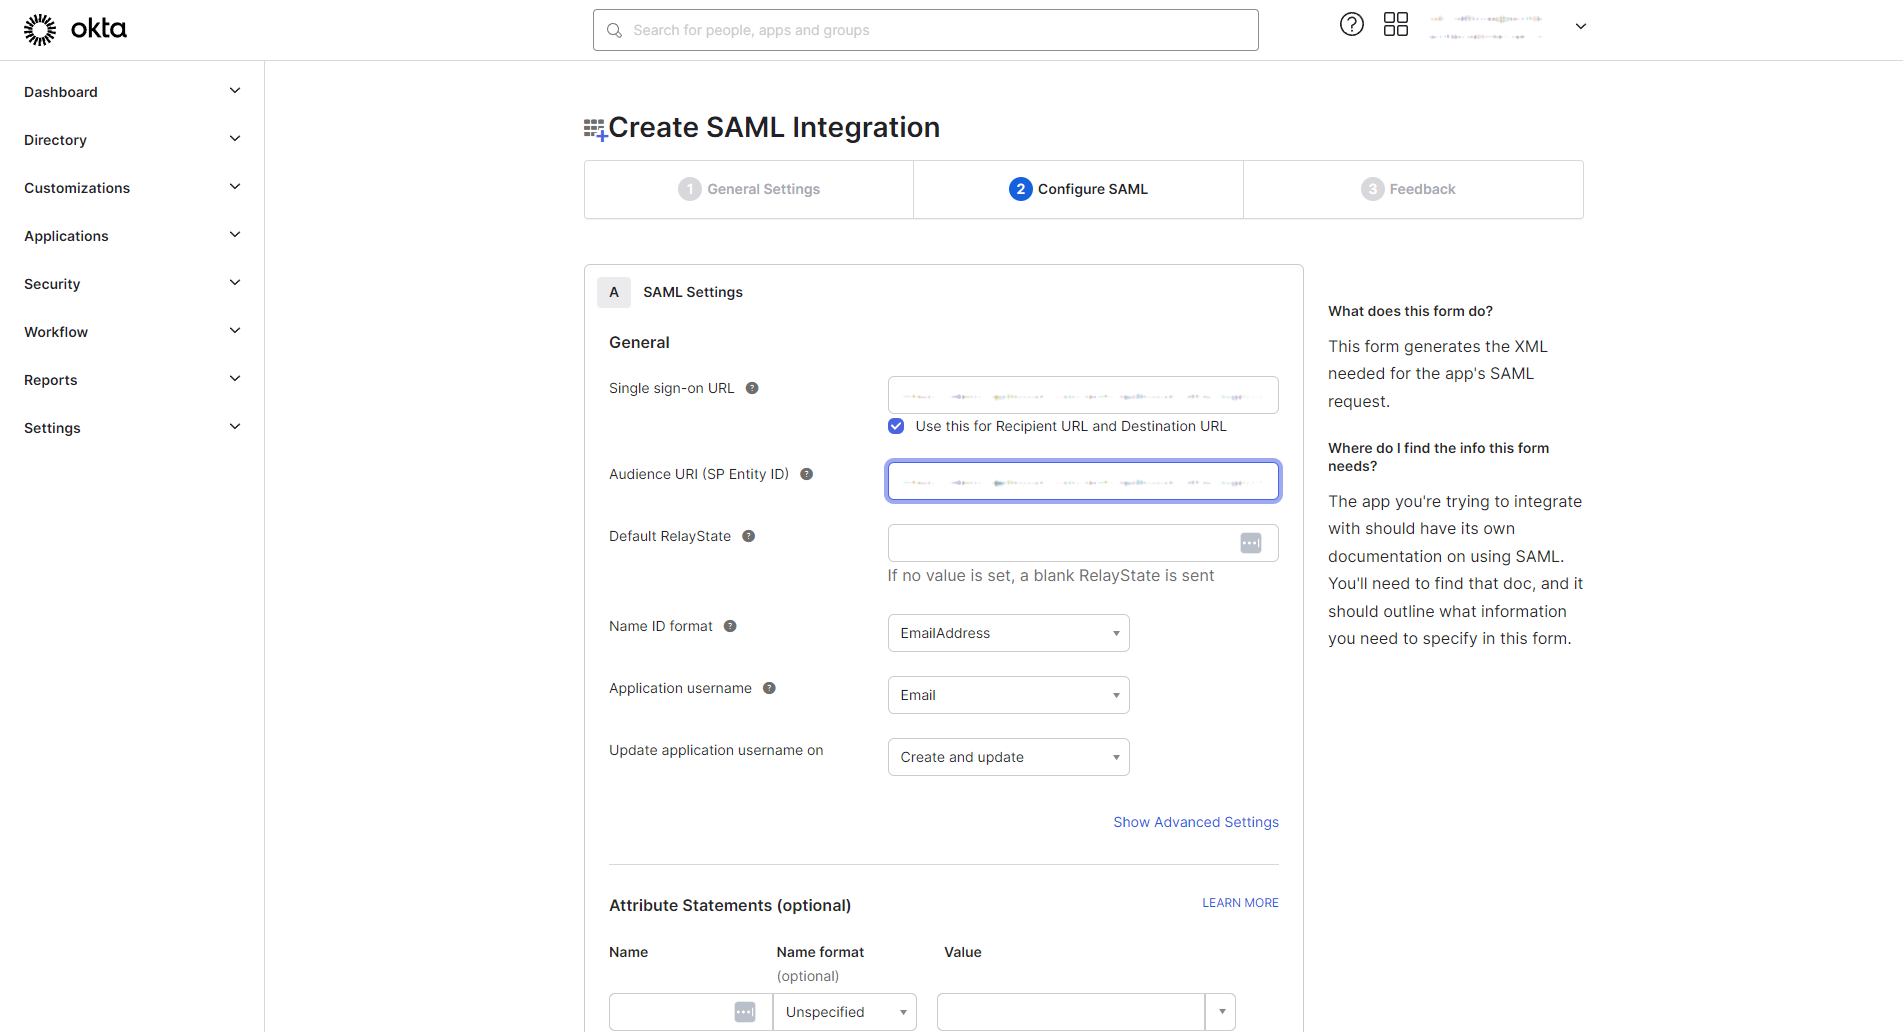
Configure SAML
In this section, tab between Apiboost the the identity provider, using the prepopulated fields to configure SAML in the IdP.
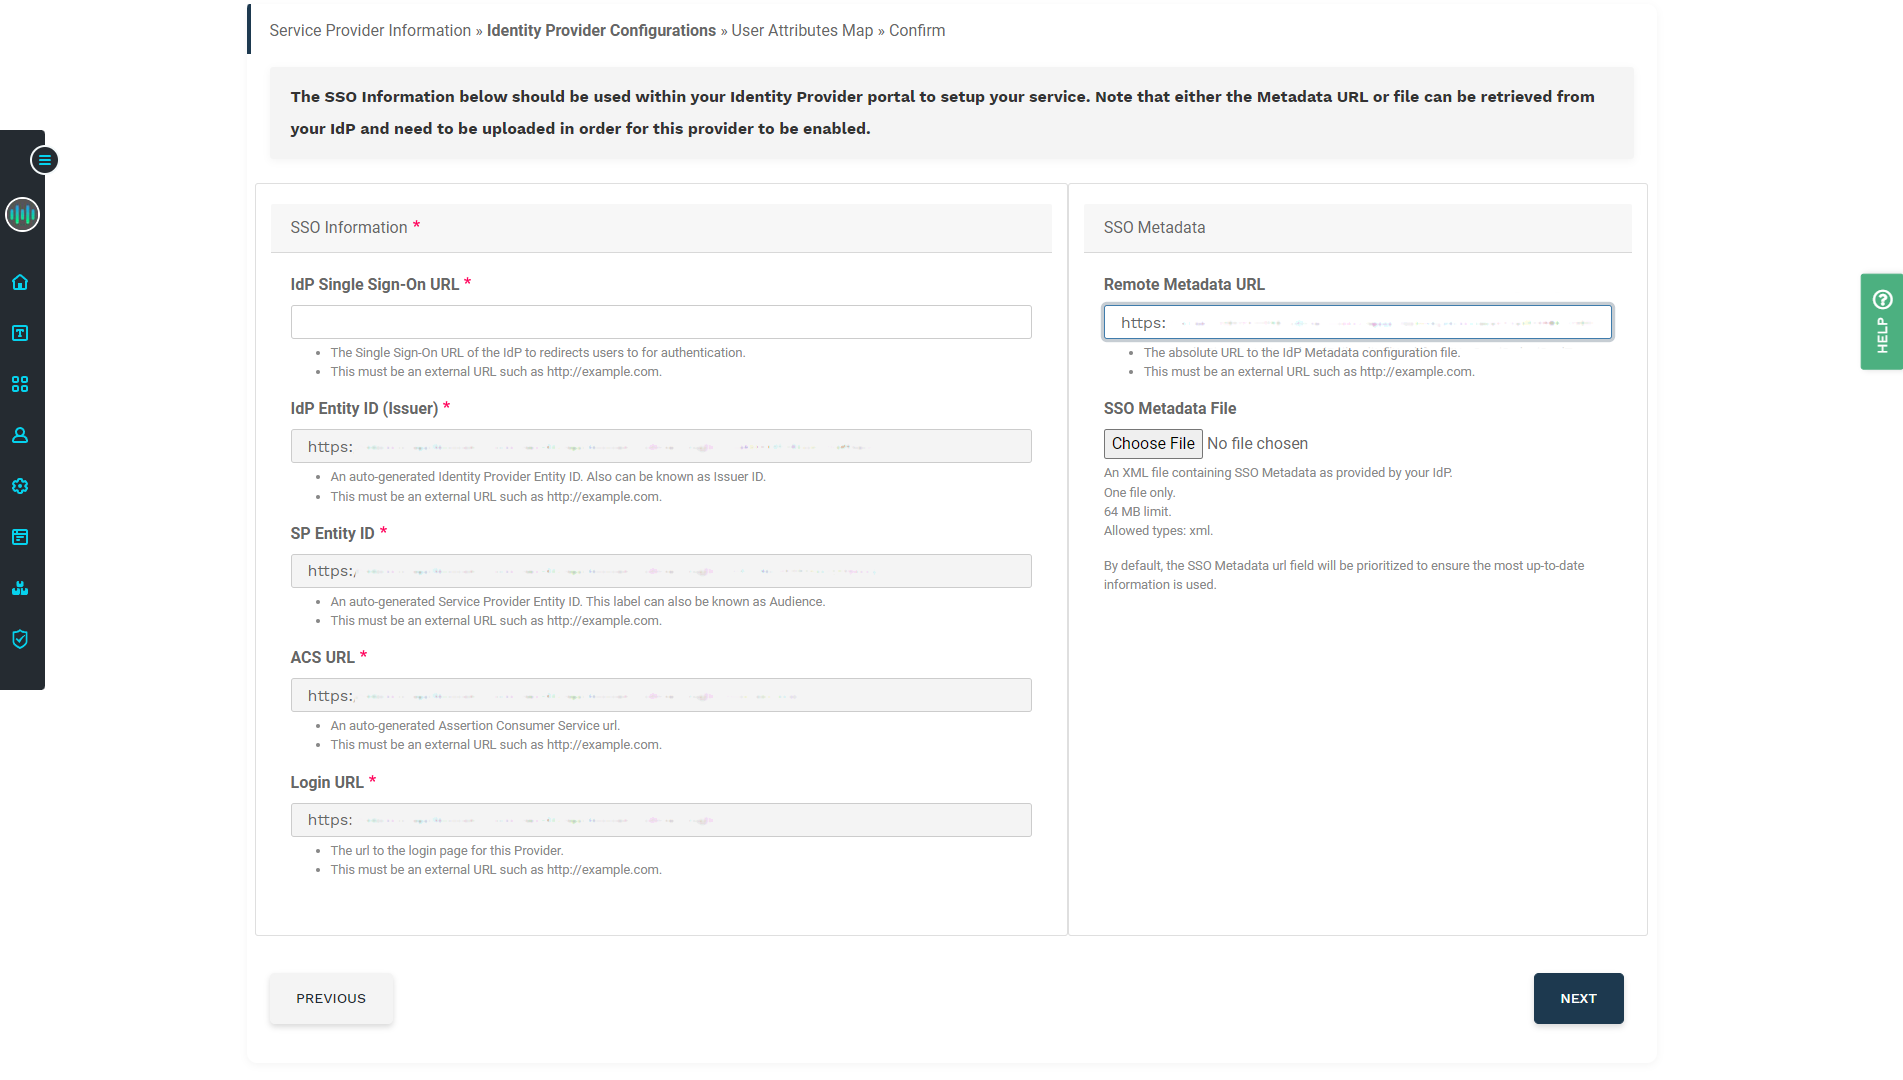
Continuing with Okta, Copy the ACS URL from Apiboost into the Single sign-on URL field in Okta:
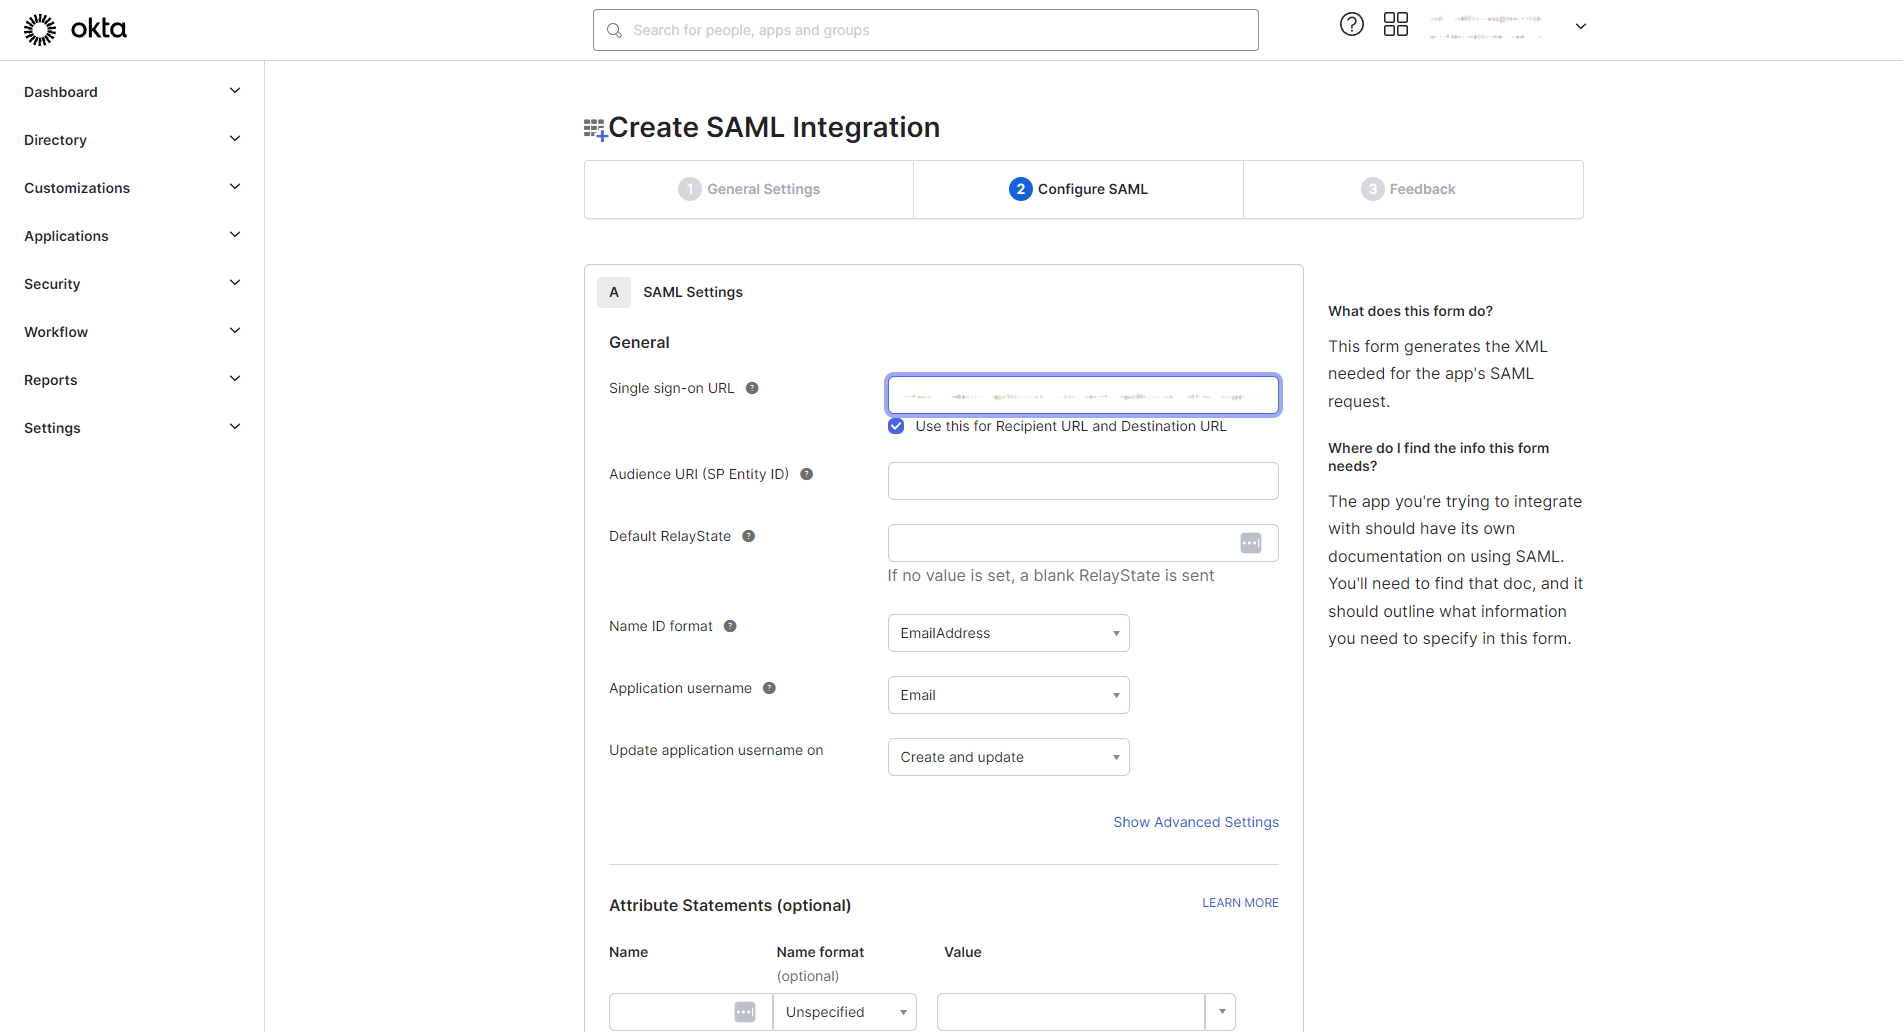
Next, copy the SP Entity ID from Apiboost into the Audience URI (SP Entity ID) field in Okta:
Attribute/Group Attribute Statements
Skip for now, the purpose is to get SSO working. Data mapping will be covered later in this document.
For now, scroll down and click next and move forward to the third and final page of SAML Integration. These settings will be covered at the end.
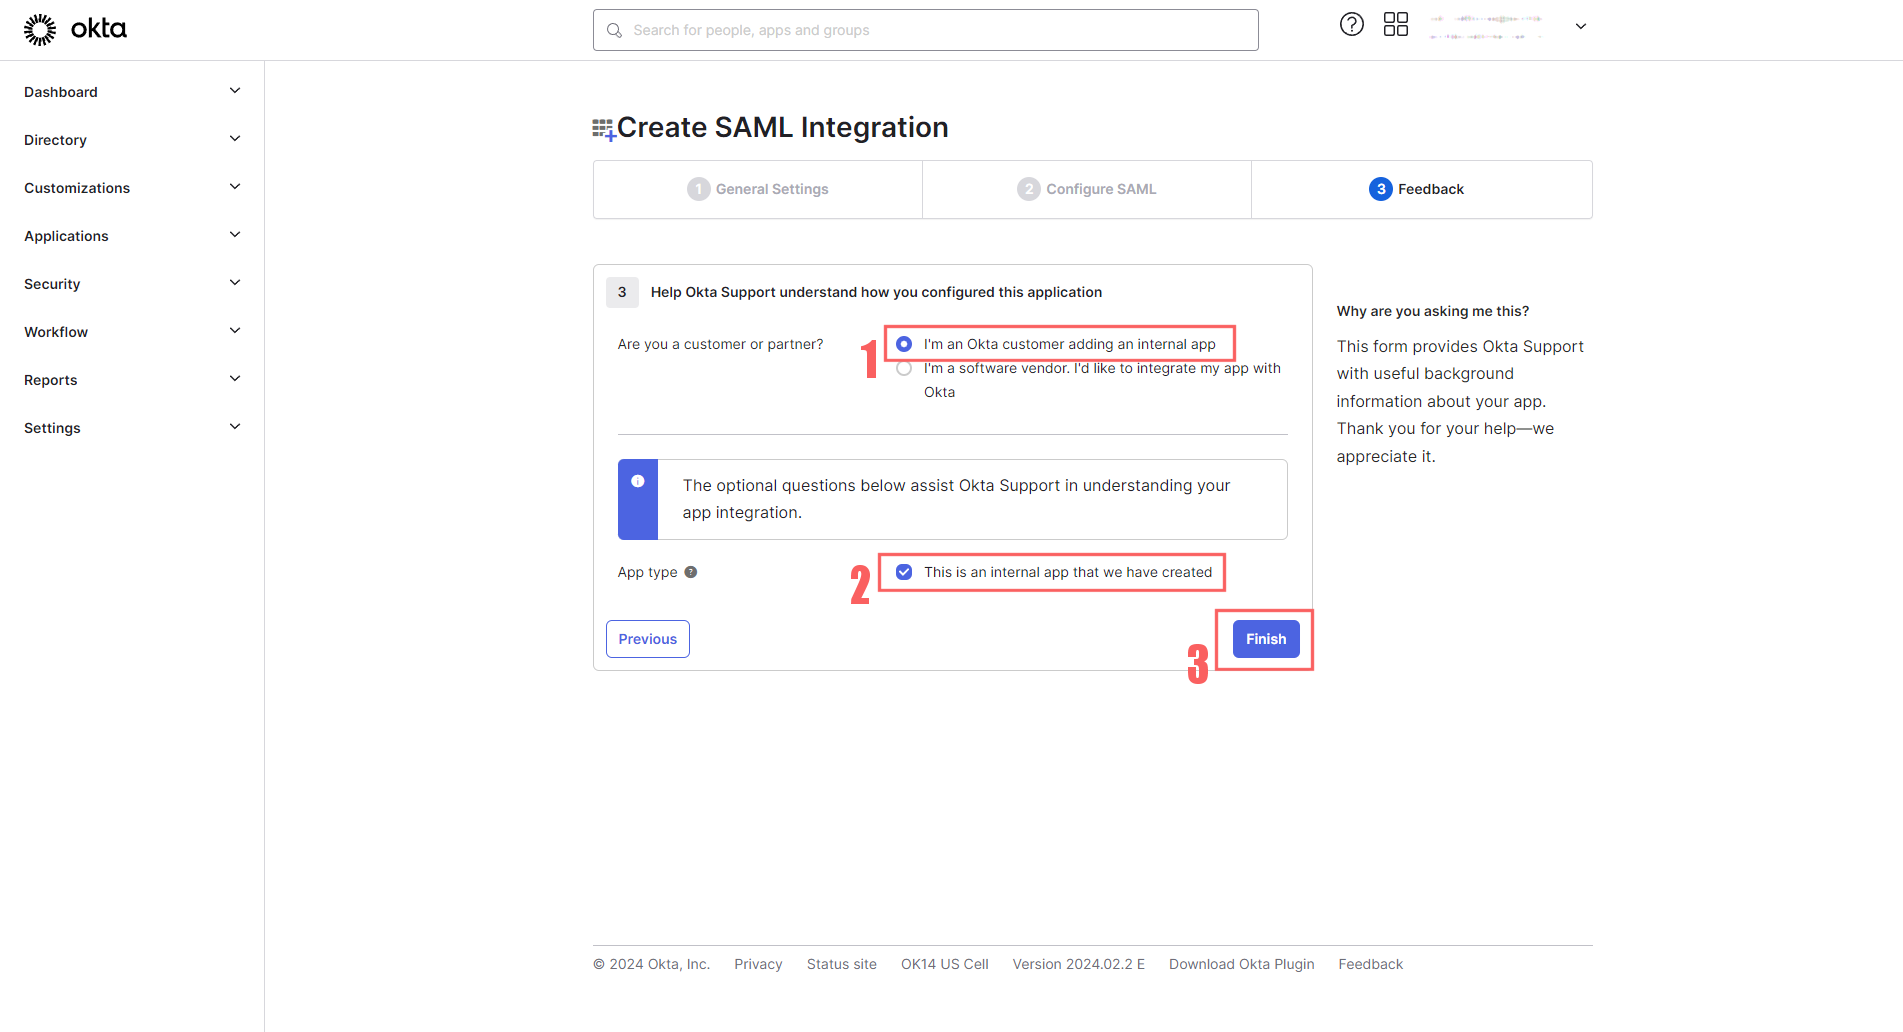
Finish IdP Setup
The last page is fairly straightforward:
-
For customer or partner, select “I’m an Okta customer adding an Internal app”
-
For App type, select “This is an internal app that we have created,”
-
Finally, click Finish to save your new app.
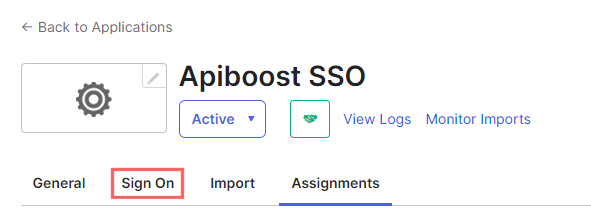
Completing Apiboost Setup
This will require some tabbing back and forth. The same way fields were required first from Apiboost to set up Okta, now some data is needed from Okta to finish setting up Apiboost. From the side menu, click Applications, then click the one created using the steps above, and in the navigation tabs, click Sign On:
Under the Sign On tab, scroll down and there will be a SAML 2.0 section with Metadata details. Look for Metadata URL and click the copy button:
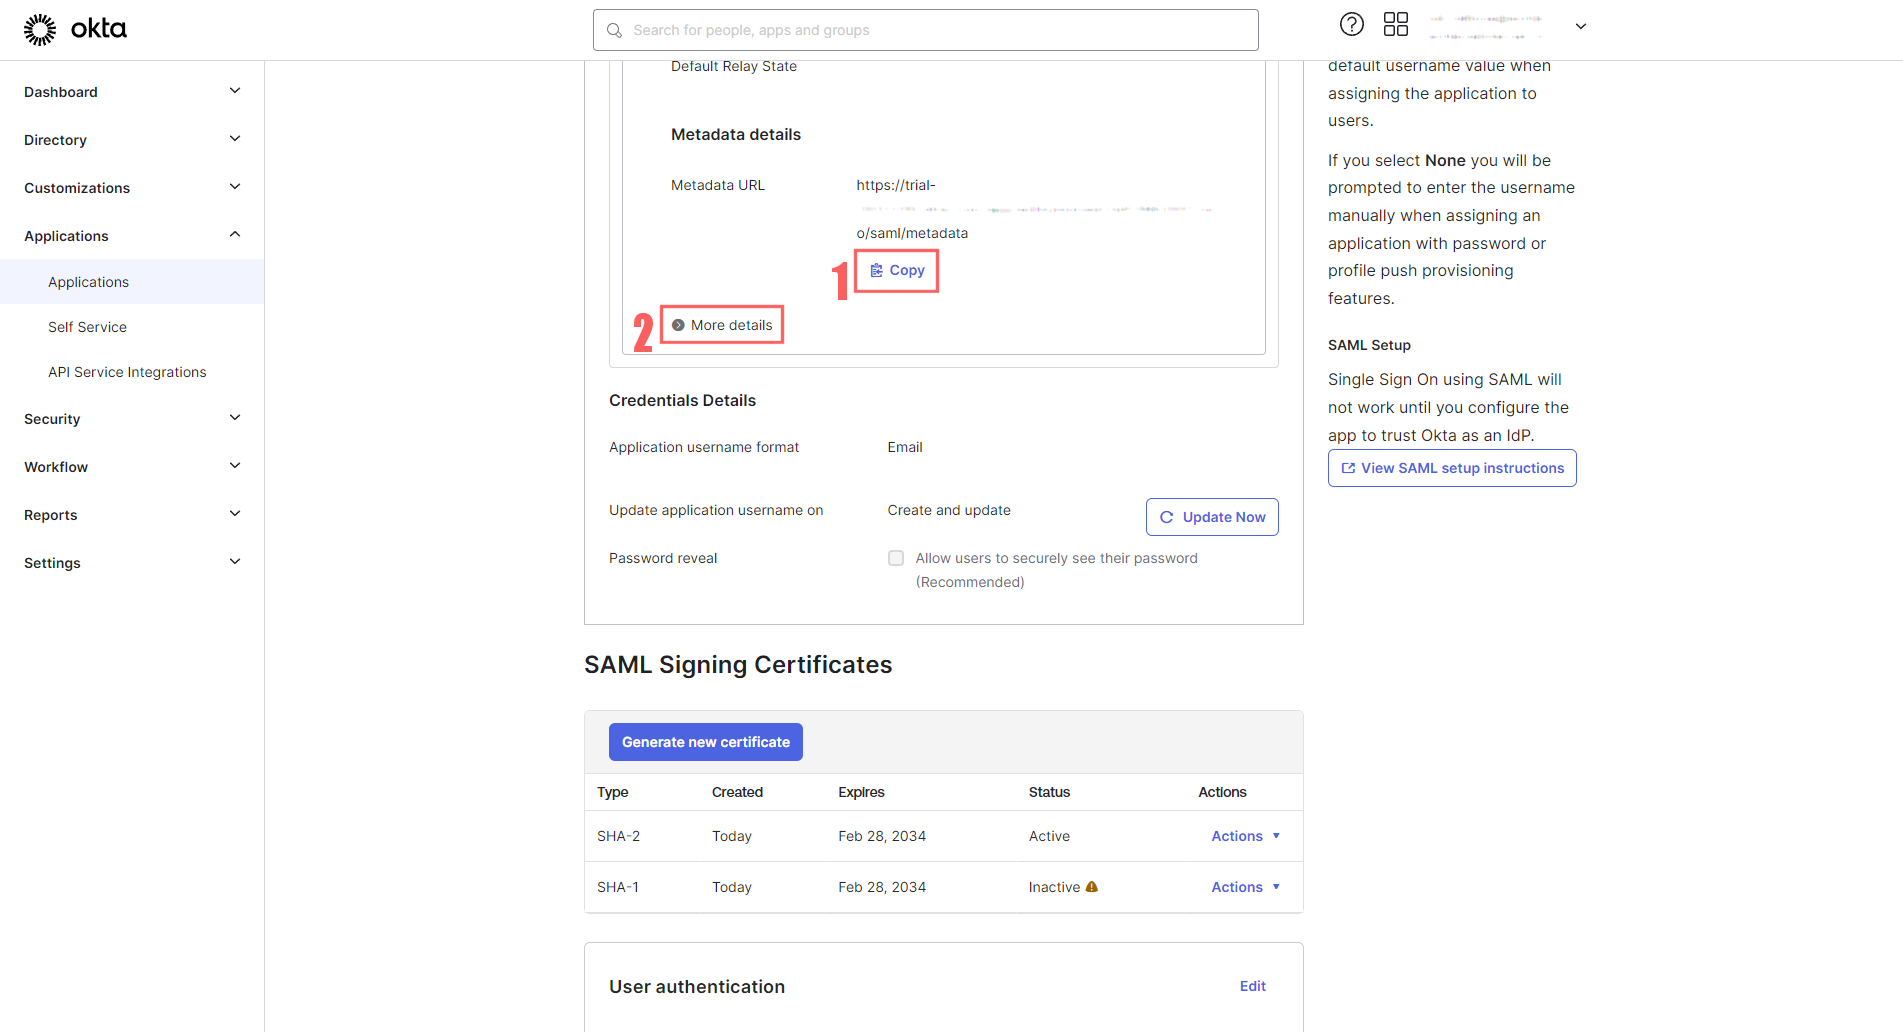
Before proceeding, click the More details button to expand that section. Now tab over to Apiboost and paste the Metadata URL in the field on the right side:
Tab back to Okta, and expanding details should have revealed a Sign on URL. Click the Copy button:
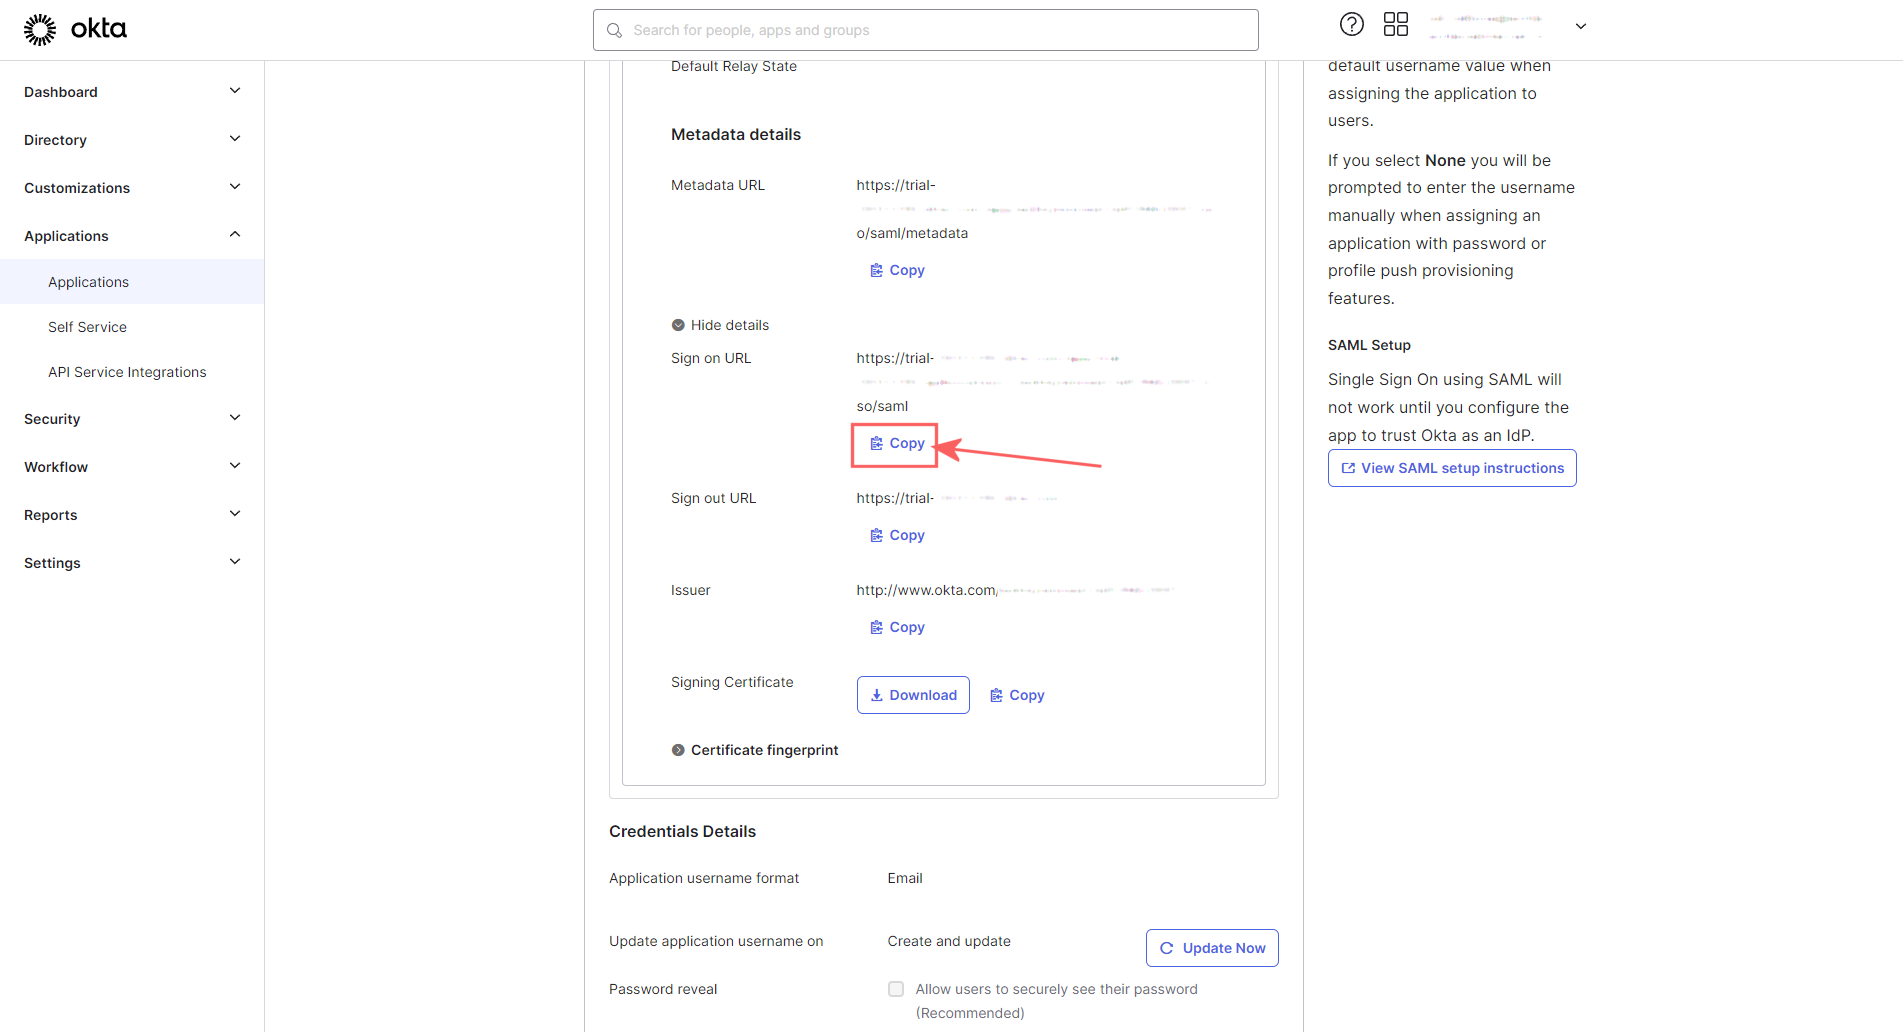
Paste the Okta Sign on URL into the IdP Single Sign-On URL field in Apiboost. This configuration is done for now, click next to finish setting up SSO in the Apiboost backend.